Quantcast
Channel: AEM Guide
Viewing all 162 articles
Browse latest View live

Working with AEM i18n translator

$
0
0
The Adobe AEM Translator is a powerful tool for managing and updating translations.  Using this tool you can create, update and remove i18n values across multiple languages in multiple translation dictionaries or groups of i18n keys.

USING THE AEM TRANSLATOR

To use the AEM Translator access the URL http://{SERVER}:{PORT}/libs/cq/i18n/translator.html, replacing the server and port with the correct values for your environment.  This will pull up the AEM Translator as shown below.
CQ5 Translator
The AEM Translator
The AEM translator allows you to manage multiple dictionaries, or sets of localized keys.  This allows you to separate out site or application level keys from system keys and keep the keys organized by function or use.  To change your dictionary, select the dictionary from the Dictionaries list on the top of the AEM Translator.  It is recommended to avoid updating the dictionaries found under /libs as doing so will complicate your upgrade process.

UPDATING KEYS

To update the value of a key, double click on the key, enter the new value and select save.  The AEM Translator will not update keys for language pages which do not exist in the current dictionary.  Unfortunately it will not display an error either.  If there are no translation values for the language you wish to update, ensure there is a translation page by checking for a translation page under the dictionary path in CRXDE Lite.  If no translation page exists, please consult the Creating a Translation Page section for more information on creating one.

IMPORTING AND EXPORTING

The CQ5 Translator supports importing and exporting keys using the XLIFF format, a XML format specifically designed for containing localization data.

Exporting Keys

To export keys, select Export then the language to export from the top menu.  If you receive a 404 error on the resulting page, this means that there is not a language page for that language in the dictionary.  See Creating a Language Page, for information on how to create a language page.
Unfortunately, the Exported language data will only contain keys which already have a value.  Prior to exporting, you must enter a placeholder value in every un-translated key to get it to appear in the export file.

Importing Keys

Importing keys is simple, select the Import drop down and select the file to import.  Unfortunately, the import process will also not create language pages.  To import a XLIFF file for a language which previously did not have a language page, you must first create the language page.

CREATING A DICTIONARY

Dictionaries are sets of translations grouped by application or functionality.  Adobe CQ includes a number of out of the box dictionaries for internal functionality and the Geometrixx application.  It is generally recommended to not update these dictionaries, as this may cause issues is subsequent upgrades.
You can create a new dictionary under your application under any directory.  I would recommend under /etc/i18n as localization keys are somewhat different than code and content and therefore best belong under neither tree.  To create a new dictionary, simply create a sling:Ordered folder to contain the language pages and create a language page.  At this point, the dictionary should appear in the list when you refresh the CQ5 Translator.

ADDING A LANGUAGE

Do the following to add a language to the available languages in the CQ5 Translator. 
  • Using CRXDE Lite, create a node at /ect/languages if one does not already exist. 
  • Add a repeating String property called languages to this node, with the two or five letter language names you wish to see inside the CQ5 Translator.  The value of this field determines all of the available translations, so make sure you include the predefined languages as well as the ones you mean to add. 
  • Create a language page for each dictionary you intend to translate into the new language.
Once you have completed these steps, you should be able to add translations in the new language.

CREATING A LANGUAGE PAGE

The CQ5 Translator will not automatically create language pages when you add a language to a dictionary or create a new dictionary.  To create a new language page, do the following:
  • Using CRXDE, create a new sling:Folder node in the dictionary root with the two or five letter, ISO 639-1 compliant, language name, ex: es or zh_cn
  • Add the mixin type mix:language
  • Set the jcr:language property to the two or five letter, ISO 639-1 compliant, language name, ex: es or zh_cn
Once you have completed these steps you should be able to add translations for the relevant language into the dictionary.

Versioning ClientLibs in AEM

$
0
0
The Versioned ClientLibs ACS AEM Commons feature uses a Sling rewriter to add an MD5 hash to the paths of your clientlibs, forcing them to recache after every modification. Typically Adobe Experience Manager will use the lastModified property to determine when to recache, however versioned-clientlibs is a more reliable approach.
To implement the versioned-clientlibs feature, simply copy the node from /libs/cq/config/rewriter/default to some path inside your application. In this example, we’ll choose /apps/acslibs/config/rewriter. For the most part this path is arbitrary, however the config node must be inside a four-level-deep path that ends in config/rewriter to work.Read More
References:

Listing of Ask the AEM Community Experts

$
0
0
Target audienceAEM authors, admins, and developers
Applicable CQ versionsAEM 5.6 and later

The following table provides a complete listing of all of the sessions of Ask the AEM Community Experts. 

NameDescriptionLink
Using AEM Forms
(April 2016)
Rajesh R. Kandasamy, a community contributor, (and other communuity members) provide an in-depth look at how to work with AEM Forms to build data capture applicationsClick Here
A Deep Dive into Sightly 
(Mar 2016)
Praveen Dubey, a top community contributor, for an in-depth look at how to use Sightly to build engaging Experience Manager Components.Click Here
Developing AEM Sling Components using Brackets
(Feb 2016)
Lokesh (Top AEM Community member of the year for 2015) for a walk though on developing Adobe Experience Manager Apache Sling components using Brackets. By joining this session, you will learn developer techniques using Brackets to program experience manager components using Sling APIs.Click Here
 A Deep Dive into AEM Apps
(Nov 2015)
Join the AEM Applications Eng team for a discussion about AEM AppsClick Here
Integrate AEM and other Digital Marketing products
(Oct 2015)
discussion about how to integrate Adobe Experience Manager and other Digital Marketing products.  Included in this discussion is an emphasis on AEM and AnalyticsClick Here
AEM & Dispatcher
(Sept 2015)
AEM expert Joerg Hoh @joerghoh provides insight into using Dispatcher with Adobe Experience Manager. By viewing this session you will gain a better knowledge about Dispatcher as well as best practices for configuring, using and securing communication between Dispatcher and AEM.Click Here
Personalization & segmentation with AEM & Adobe Campaign
(Aug 2015)
Shows you how to work with AEM and Campaign to create personalization and segmentation experiences. The password to access the recording is AugATCEClick Here
Advanced AEM component development
(July 2015)
Provides insights on creating components that use CQ.Ext APIs, build custom xtypes, invoke sling servlets, and build  advanced dialogs for components.Click Here
AEM & Sling
(May 2015)
Learn about Sling and its use within AEM. Click Here
Creating AEM Touch UI components
(April 2015)
Learn how to create touch UI components, create dialogs and use Touch UI based APIs meant for component development.
(To watch this session, click link and enter password AtAEMCE.)
Click Here
Understanding AEM Workflows
(Mar 2015)
Provodes an in-depth on AEM Workflows. Included in this session is the different type of workflows you can create, building workflow models, how to create a custom workflow step, how to use Workflow launcher, and available workflow operations. By viewing this session, you will gain a deeper understanding of how to work with AEM workflows to address your business requirements.Click Here
Building login-based sites in AEM
(Feb 2015)
Walks through a presentation and demo on developing secure AEM web sites that require user authentication. This session will provide you with a deeper understanding of how to build AEM secure web site by using Sling technology.Click Here
Introduction to Sightly
(Jan 2015)
Provides an Introduction to Sightly Click Here
Getting Started with AEM Apps
(Nov 2014)
Talks about how to get up and running with AEM apps and developing mobile applications for use with Adobe Experience Manager. Click Here
Testing AEM Applications with ease
(Oct 2014)
Demonstrates the new AEM Testing tool for testing AEM applications. You will learn how to use the new tool, you and new ways to improve your AEM applications and get rid of potential bugs.Click Here
Developing custom services to customize AEM
(July 2014)
This session covers developing custom services to customize AEM. It provides details on how to develop Java-based services to customize AEM to meet your business requirements.Click Here
Reference:

Learn Sightly with Read–Eval–Print Loop in AEM 6.x

$
0
0
A great live code editing environment for Sightly templates with optional server-side JavaScript logic, executed on an Adobe Experience Manager instance. This little tool is great for learning Sightly and for experimenting with it, because the resulting output is displayed as you type.
To get started you need minimum Adobe Experience Manager 6+, there are you two ways you can setup your environment and start experimenting:-
1. Install as a Package
  • Download the built package: com.adobe.granite.sightly.repl-1.0.2.zip.
  • On your running AEM instance, go to Package Manager, click on Upload Package, browse to the previously downloaded package, and hit OK.
  • Install the package com.adobe.granite.sightly.repl-1.0.2.zip. Don’t mind the missing dependencies, simply click the Install button and confirm.
2. Maven Method
  • Checked-out https://github.com/Adobe-Marketing-Cloud/aem-sightly-repl repository with Git clone.
  • Build and install it with following command line instruction:
    mvn clean install content-package:install
Once any of the above steps are performed for installation, go to the following URL on AEM instance localhost:4502/content/repl.html
Sightly Read Eval Print Loop (REPL)
Sightly Read Eval Print Loop (REPL) will give you three options:-
  1. Source :- Shows the generated HTML Structure of webpage
  2. View :- Output of webpage can be seen here, this is the same which you will see in your browser
  3. Java :- Complied sightly Java class
It’s a great environment for people who are willing to get hands on Sightly and want to gain some experience in it.

Top Features in Adobe Experience Manager 6.2: Sites

$
0
0
  1. Find Anything Anywhere
    Adobe has introduced an updated Touch UI. This is actually a great enhancement, but once again Adobe is changing the user interface. It’s hard on authors to constantly need to learn a new way of doing things and navigating around, and it means additional training for people when they upgrade from one version to another. But let’s not get bogged down with negativity. The new update to AEM is called OmniSearch and this is a really decent way of getting around. No longer do I have to do multiple clicks to find my tags. I just type “tags” and then the page loads. It also comes with search suggestions that show you all the possible destinations within AEM and the ability to do filtered searches. Also, they removed the need to go to a “selection mode” to select multiple items (pages, assets, etc.) when you need to activate them or update their properties. That’s great.
  2. Templates for Everyone
    This is the new Template Editor. Last year when they teased this I mentioned how reluctant I was about it. Put the template in the hands of the authors and not the developers, are you insane? I still feel that way, but not as strongly now. An author can still royally screw things up, if you give them the permissions to do so. And that is the key. You can tie down this functionality by only giving it to people who actually know what they are doing. I was able to chat a bit with Gabriel Walt during Summit and that was his big piece of advice. So, we can still be happy, authors can still feel empowered, and developers won’t have to do as much. I had a chance to play around with it a bit in one of the Summit lab sessions and it certainly shows some promise.
  3. Content Mixology
    Content fragments! This is very interesting. You get to treat content as an asset. And that is actually where it is stored as well, within the Assets (DAM) section of AEM. No longer does your content need to be freeform and disconnected. This could become incredibly useful if you need to use the same content in different places, because then you can just edit it once and it shows up everywhere else you need it. This content becomes “channel agnostic”. It also allows you to tie other assets to it, making it easier to find when you want to use an image along with your content. You can make variations of the fragment as well. It is a scaled down and simpler authoring experience, so don’t expect it to have all the AEM bells and whistles. I think this is an innovative idea.
  4. Social Power
    This is all about content reuse. You can use content fragments in Communities as well, and this seems like a cheap new feature since we already learned about content fragments. But, content published in or coming from Communities can become a content fragment. To be clear, this is user-generated content, not content created by AEM authors. So if someone wrote a blog post or posted a comment to a forum, you could capture that piece of content and then move it into Assets.
  5. Fire Up Content at Scale
    AEM is now structured to work with Livefyre to allow you to capture user-generated content from other sources and bring it into your web channel experience. Livefyre components now come as part of AEM, and they bring in content from these other sources. The nice thing is that you choose what content comes in. These assets are stored within AEM Assets.
  6. Fine-Grained Personalization
    Like peanut butter and chocolate, Target and AEM were made for each other. They are now together using the same user interface and code base to run their features. I saw this coming a couple years ago when we were helping the Target team get their Target demo running (demo.adobe-target.com). And now that they are together, it seems like a no-brainer to merge these two solutions. Create your audiences, activities, and experiences for your content and do your testing, all within AEM. Frankly, I always thought Target was much better than the AEM personalization tools, and I usually recommended that to customers. Seeing this finally pay off such that Target becomes the default personalization engine feels like a win all around. Obviously, this change comes with a cost. You don’t get to just use all the features of Target in AEM for free. You’ve gotta pay for it.
  7. Target Locally, Manage Globally
    Using this new part of Multi Site Manager, you can allow geolocated people to modify things to suit them. The global campaign (or Target activity) that was set up can be manipulated at the local level to give it a more personal touch for that language or location. The Target piece gets sent along with the rest of the page info/content.
  8. Roll with the Masters
    If you’ve been using AEM for a while, you know that different parts of the Capability get different levels of attention. One that has been underserved for a while now is the localization features available in MSM, specifically in regards to Assets. In AEM 6.1 and lower, there was no support for localization of Assets—6.2 finally addresses this, bringing the full suite of localization tooling to Asset management. Back in Content Mixology, I talked about content fragments, and how they are—under the covers—represented as an asset. Because of this addition, content fragments are also able to be localized using the same tools as your other content. You can also pick and choose which parts of your content are localized via machine translation, and which parts involve human translation efforts; this can be really handy once you start determining which content is popular in which geos, allowing you to focus on getting the largest benefit for those human translation dollars.
  9. Back to the Roots
    6.2 introduces a new concept called Continuous Publishing, which brings a greater degree of flexibility to control which pieces of content are managed via the AEM Launch tool, and which pieces of content are part of which Launches; the first iteration of Launches was introduced with 6.1, but 6.2 really starts to make this feature a larger part of AEM Sites. The general idea is to control what goes into the publish queue, and at what point in time, and what degree of immediacy it gets.
  10. Best Practices Bonanza
    Now there is a new default site that people can play around with called We.Retail. I’m glad they are updating this to stay with new features and we don’t have to keep talking about Geometrixx, but in the back of my mind the whole time I just kept thinking “great, one more thing I need to make sure and remove, before a site goes live, when we do an implementation for a customer”. I am such a pessimist. :) All the code is in github for you to look at.
Bonus Feature. Connect Clicks and Bricks – Last year Adobe told us about AEM Screens. More progress is being made in this area and it is now part of 6.2. It will allow you to push content through various screens and channels. They really seemed determined to make Screens a part of AEM. It’s certainly another channel for your content, but it still just seems so theoretical. Maybe now that it is more tied in with AEM it will start to show some additional use cases. But when they talk about the capabilities of AEM, I still don’t always see them adding Screens to the list of Sites, Assets, Communities, Forms, and Mobile.
AEM 6.2 has quite a few new features and we look forward to exploring them further. If you’re looking for a more in-depth review of AEM 6.2 Sites, then I recommend you check out the Summit presentation, or look over some of the links below. If you know of any other features that you are excited about in 6.2, let us know via email (info@aempodcast.com) or Twitter (@axis41).

Integrating AEM with Adobe Analytics and Target using DTM

$
0
0
You can create Adobe Experience Manager (AEM) solutions that integrate with these Ditigal Marketing products: Adobe Analytics, Adobe Target, and Dynamic Tag Manager (DTM).
Adobe Analytics is the industry-leading solution that lets digital marketers analyze and optimize integrated data from all online initiatives across multiple marketing channels. It provides marketers with actionable, real-time web analytics intelligence about digital strategies and marketing initiatives.
Adobe Target is a personalization solution that lets you easily identify content through tests that are easy to execute. Therefore, you can deliver the best experience to your web visitors. In this article, personalization of the landing page is driven by Target. AEM will import Audiences from Target so that they can be used right within AEM to create activities to personalize our page. AEM then synchronizes the activity to Target.
DTM is a Digital Marketing cloud service that allows a marketer to manage Adobe and third-party tags used for tracking or other analytic purposes. It is done through client-side scripting that injects tag related code throughout the pages of the site.
By using these products together, you can build engaging solutions that let you deliver the best content to a given web site visitor. That is, you display content from AEM DAM that meets the interest of the visitor. This development article walks you through how to build a solution that uses AEM, Analytics, Target, and DTM. 
The following illustration provides an overview some of the Marketing Cloud solutions (AEM, DTM, Analytics, and Target) used in this article.

Overview of the Digital Marketing Solutions

Using Custom Tag Libraries to search for AEM Content Tags

$
0
0
You can create custom tag libraries for Adobe Experience Manager (AEM) and use them to search for AEM content tags. Tags are a quick and easy method of classifying content within your website. In technical terms, a tag is a piece of metadata assigned to a content node within AEM (usually a page). A custom tag library uses an OSGi component. Within the OSGi component, the AEM Tag Manager is used to search for the content tags, For information about the API, see TagManager API.
A custom tag library is implemented as an OSGi bundle that contains a Java class that extendsTagSupport. For information, see Class TagSupport.
You also need to define a tag library descriptor (TLD) file and bundle that within the OSGi bundle. For information, see Tag Library Descriptors.
After you develop an AEM custom tag library, you can invoke its actions from an AEM component. For example, the component can display information about tag usage (for example, the number of times it is used). In this article, a Tags xtype is used to let the author select a tag from an AEM dialog, as shown in the following illustration.

Working with Adobe Experience Manager Content Fragments

$
0
0
In AEM 6.2, you can use content fragments that let you create original content in AEM, enabling copy writers to create editorial content before it is being authored in a page, and to further allow curating such content by creating channel specific variations and by associating collections with relevant media content. As a result, web producers receive content that is prepared and "ready to go”, enabling them to focus on assembling content across channels, globally and on a local level.

Bulk Editor in AEM

$
0
0
The Bulk Editor allows for very efficient editing when the visual page context is not needed as it lets you:
  • search for (and display) content from multiple pages; this is done using GQL (Google Query Language)
  • edit this content directly in the bulk editor
  • save the changes (to the originating pages)
  • export this content to a tab-separated (.tsv) spreadsheet file
file


Goto Tools-> Importers -> Bulk Editor


How to Use the Bulk Editor

The bulk editor allows you to:

    SEARCHING AND EDITING CONTENT

    To use the bulk editor to edit multiple items simultaneously:
    1. In the Tools console, click the Importers folder to expand it.
    2. Double-click the Bulk Editor to open it.
    3. Enter your selection requirements:
      FieldProperty
      Root PathIndicates the root path the bulk editor searches.
      For example, /content/geometrixx/en. The bulk editor searches over all child nodes.
      Query ParametersUsing GQL parameters, enter the search string you want the bulk editor to look for in the repository; for example, type:Page looks for all pages in the root path, text:professional looks for all pages that have the word "professional" in them, and "jcr:title":English looks for all pages that have "English" as the title. You can only search for strings.
      Content Mode check boxSelect this check box to read properties within the jcr:content sub node of the search results if exists. Use for pages only. Property names are prefixed with "jcr:content/"
      Properties/ColumnsSelect the check boxes for the properties that you want the bulk editor to return. The properties you select are the column heads in the results pane. By default, the node path is displayed in the results.
      Custom Properties/ColumnsEnter any other properties that are not listed in the Properties/Columns field. These custom properties appear in the results pane. You can add multiple properties by using a comma to separate properties. Note: If you add a custom property that does not yet exist, CQ WCM displays an empty cell. When you modify the empty cell and save it, the property is added to the node. The newly created property must respect node type constraints and property namespaces.
      For example:
      file
    4. Click Search. The Bulk Editor displays the results.
      For the example above, all the pages that meet your search criteria are returned and displayed with the requested columns.
      file
    5. Make any changes you need by double-clicking in a cell.
      file
    6. Click Save to save your changes (the Save button will be activated once you have edited a cell).

    Additional GQL Query Parameters

    • path: only search nodes below this path. If you specify more than one term with a path prefix, only the last one will be considered.
    • type: only return nodes of the given node types. This includes primary as well as mixin types. You may specify multiple comma separated node types. GQL will return nodes that are of any of the specified types.
    • order: order the result by the given properties. You may specify multiple comma separated property names. To order the result in descending order simply prefix the property name with a minus. E.g.: order:-name. Using a plus sign will return the result in ascending order, which is also the default.
    • limit: limits the number of results using an interval. E.g.: limit:10..20 Please note that the interval is zero based, start is inclusive and end is exclusive. You may also specify an open interval:limit:10.. or limit:..20 If the dots are omitted and only one value is specified GQL will return at most this number of results. E.g. limit:10 (will return the first 10 results)

    EXPORTING CONTENT

    You may need to export content and make changes to it in an Excel spreadsheet. For example, you may want to export a mailing list and change the area code of all the listed phone numbers directly in Excel, add additional lines, and so on.
    To export content:
    1. Search for content as described in Searching and Editing Content.
    2. Click Export to export the changes into a tab-separated Excel spreadsheet. CQ WCM asks you where you want to download the file.
      NOTE
      By default, changes are encoded in Windows-1252 (also known as CP-1252). You can check UTF-8 to export the changes in UTF-8.
      file
    3. Select the location and confirm that you want to download the file.
    4. After you download the file, you can open it from your spreadsheet program, for example, Microsoft Excel. The spreadsheet program imports the file and converts it to a spreadsheet format.
      file

    IMPORTING CONTENT

    By default the import functionality is hidden when you open the Bulk Editor. Simply adding the parameter hib=false to the URL will display the Import button on the Bulk Editor page. You can import content from any tab-separated (.tsv) file. In order for importing to work properly, the column headings (first row of cells) must match the column headings of the table you are importing to.

    NOTE
    When you re-import content, you erase any previous content for those nodes. Be careful not to overwrite important information.
    To import content:
    1. Open the Bulk Editor.
    2. Add ?hib=false to the URL, e.g.:
      http://localhost:4502/etc/importers/bulkeditor.html?hib=false
    3. Click Import.
    4. Select the .tsv file. The data are imported into the repository.

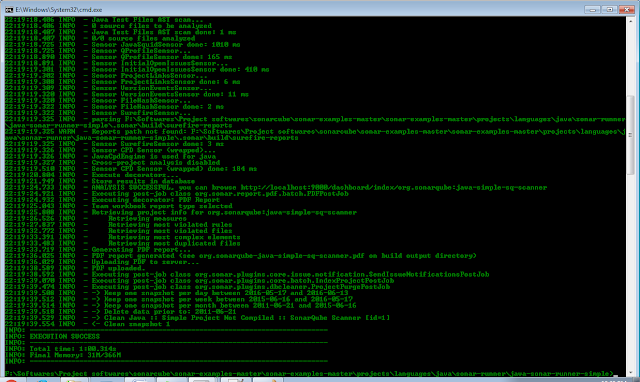
    Sonarcube PDF report generation - Code Review

    $
    0
    0
    • Download Sonarcube 4.5.7 version.
      • Download the pdf repport plugin 1.4 version from. 
        • Copy and paste the pdf report plugin to ../extensions/plugins/
        •  Start the server by running ../bin/StartSonar.bat.


        • Once server is up, create a sonar-project.properties file in either root path or sub module of codebase.
          • o   Eg: root path: ../GIT clone/<Parent folder>/
            o   Sub module path: ../GIT clone/<Parent folder>/<module>
          • Sample sonar-project.properties file
            •  # Required metadata
              sonar.projectKey=org.sonarqube:java-simple-sq-scanner
              sonar.projectName= <<Give any name>>
              sonar.projectVersion=1.0
               
              # Comma-separated paths to directories with sources (required)
              sonar.sources=src
               
              # Language
              sonar.language=java
               
              # Encoding of the source files
              sonar.sourceEncoding=UTF-8

        • PDF can be viewed in different ways:
          • Go to codebase path either root or module folder from command prompt and run mvn sonar:sonar
            • PDF will be generated in target/sonar/ folder.
          • o   Goto Sonarcube server http://localhost:9000 and login as admin/admin.
        §  In dashboard add a widget called Pdf Report. Rerun mvn sonar:sonar from command prompt
         
        §  In PDF report widget, you can see the generated pdf. 


        AEM 6.1 Downgrade of a Java version and quickstart shows UnsupportedClassVersionError major.minor version 52.0

        $
        0
        0
        Sometimes we get below error  when accessing any AEM pages.

        Caused by: java.lang.UnsupportedClassVersionError: org/apache/jsp/apps/sling/servlet/errorhandler/_404_jsp : Unsupported major.minor version 52.0
        at java.lang.ClassLoader.defineClass1(Native Method) 

        Resoultion:
        NOTE: Please backup your AEM instance before doing this
        • Go to localhost:4502/system/console/configMgr
        • If the page opens, login as "admin"
          • Go to Menu > OSGI > Bundles [http://localhost:4502/system/console/bundles]
          • Find this "Apache Sling Commons FileSystem ClassLoader (org.apache.sling.commons.fsclassloader)" and note the BundleID (it is 218 for me)
          • STOP AEM
          • On Windows Explorer go to this path where your AEM is installed.. $path\aem-61-author\crx-quickstart\launchpad\felix\bundle218\data
          • Delete the classes folder under it.
          • Restart AEM.. this should fix the issue.
        • If the page above does not open,
          • (assuming the bundle-id is 218)
          • STOP AEM
          • On Windows Explorer go to this path where your AEM is installed.. __ $path\aem-61-author\crx-quickstart\launchpad\felix\bundle218\data __
          • Delete the classes folder under it.
          • Restart AEM.. this should fix the issue.

        Developing a custom Adobe Experience Manager Quiz Component

        $
        0
        0
        You can develop a custom Adobe Experience Manager Quiz component that lets your web site visitors perform an on-line quiz and view the results. There are business requirements that require web visitors to perform an online quiz and then track the results. Building an AEM custom quiz component satisfies this business requirement. 
        Assume that another requirement for the quiz component is the questions and corresponding answers are configurable. That is, an AEM author can set them without updating the component's application logic.
        Note:
        Using AEM adaptive forms or other forms is not a recommended way to develop a custom AEM quiz component. Instead, its better to develop a custom component as discussed in this article.
        The Quiz application is made up of two parts:
        • Quiz component -  allows web visitors to answer displayed questions and view the results
        • Quiz configuration - allows AEM authors to set questions and answers
        The following illustration shows the logic flow for the Quiz component. 
        The Quiz component logic flow

        1. The AEM Quiz configuration component lets an author set data values used in the quiz component. 
        2. The quiz configuration data is stored in the AEM JCR. 
        3. An AEM Service reads the JCR data.
        4. The OSGi Service converts the JCR data to JSON data. 
        5. The Quiz component uses the JSON data to render the quiz. 

        Use Sling Model with Sightly in AEM

        $
        0
        0
        Sling Models
        Many Sling projects want to be able to create model objects – POJOs which are automatically mapped from Sling objects, typically resources, but also request objects. Sometimes these POJOs need OSGi services as well.

        In simple terms Sling Models are simple POJO classes which are mapped automatically with Sling Objects (resource, request objects..) and allow us to access jcr node property values directly into java classes.


        Advantages of using Sling Models
        • Pure POJO classes.
        • Entirely annotation driven(Need to write less code).
        • Can adapt multiple objects –  – minimal required Resource and SlingHttpServletRequest OOTB, support resource properties (via ValueMap), SlingBindings, OSGi services, request attributes
        • Support both classes and interfaces.
        • Plugabble.
        •  Work with existing Sling infrastructure (i.e. not require changes to other bundles).


        Creating an AEM Sightly component that uses JavaScript

        $
        0
        0
        You can create an Adobe Experience Manager (AEM) Sightly component that uses JavaScript. By using JavaScript as part of your Sightly component, you can create a more dynamic component that responds to events such as when the user scrolls over text with the mouse. For example, you can change the background color an AEM web page, as shown in the following illustration. 
        An AEM Sightly component that uses JavaScript

        Access local AEM on https

        $
        0
        0

        Enabling HTTP Over SSL

        Generate Key Store
        • Create a directory named ssl in the directory where the quickstart JAR file is located.
        • In the command prompt, type the following command to create the credential and keystore:
          • keytool -genkeypair -keyalg RSA -validity 3650 -aliascqse -keystore [quickstart_dir]/ssl/keystorename.keystore  -keypass key_password -storepass  storepassword -dname "CN=Host Name, OU=Group Name, O=Company Name,L=City Name, S=State, C=Country_ Code"
        • The following example generates a private/public key pair with the following properties:
          • alias: cqse
          • keystore file: cqkeystore.keystore
          • key password: password
          • keystore password: password
        Read More

        Reduce rendition image sizes on DAM

        $
        0
        0
        By default, upon image upload to AEM’s Digital Asset Management, a “DAM Update Asset” workflow would be triggered and one of the many processes inside the workflow is to generate a web rendition of the uploaded image. And the default setting of AEM’s Image API is to always render the web-enabled version of the uploaded image. This combination helps to limit the size and the quality of the image displayed thus reducing the page load time.
        The OOTB setting for the web-enabled image dimensions is set to 1280 pixels by 1280 pixels. And the image quality is set to reduce to 90%. To change this setting, browse to AEM’s workflow console and select the “DAM Update Asset” workflow under the Models tab:

        Inside the workflow model, select the Web enabled rendition step:
        Then adjust the settings accordingly. In my example below, I have set the maximum dimension to be 640pixel by 640pixel. I have also reduced the quality of the images to 80%:
        Preliminary testing shows that file sizes of this setting (in comparison with the OOTB 1280px by 1280px; 90% quality setting) is reduced by a third, while difference in image quality is minimal. Please adjust your settings accordingly.

        Building Adobe Experience Manager 6.2 Mobile Applications

        $
        0
        0
        Adobe Experience Manager (AEM) Mobile provides a complete toolset to rapidly build, manage, and deliver mobile apps that integrate with the Adobe Marketing Cloud so you can measure and optimize app performance. Leverage existing content from multiple sources including the easy-to-use authoring environment of AEM and deliver updates without requiring app rebuilds or resubmissions. Integrate with third-party APIs to extend functionality and connect to critical business systems. Use built-in messaging and analytics to communicate with your audience and track user activity and engagement.
        Use AEM Mobile to quickly import an existing mobile application in order to begin instantly managing its content. Learn the techniques that will allow non-technical users to begin authoring content for an existing mobile application and prepare for updates to be published. Take advantage of existing content in AEM that can be re-used in a mobile delivery channel and learn the simple steps to integrate your mobile apps with the Marketing Cloud. Master the use of the AEM Verify tool throughout the entire app development process.

        In this development article, you learn how to use AEM and PhoneGap to quickly and easily build your own mobile application, how to test it in simulators for a range of devices, and how to track app usage.

        AEM Components for the Touch-Optimized UI

        $
        0
        0
        AEM components are used to hold, format and render the content made available on your webpages.
        • When authoring pages, the components allow the authors to edit and configure the content.
          • When constructing a Commerce site the components can, for example, collect and render information from the catalog.
            See Developing eCommerce for more information.
          • When constructing a Communities site the components can provide information to and collect information from your visitors.
            See Developing Communities for more information.
        • On the publish instance the components render your content, presenting it as you require to your website visitors.

        Dialog Conversion Tool

        $
        0
        0
        The dialog conversion tool is provided to help you extend existing components that only have a dialog defined for the classic UI (based on ExtJS). The tool uses this original dialog to create a duplicate dialog designed for the touch-optimized UI (based on Granite UI/CoralUI).

        Download and Install the Dialog Conversion Tool


        1. Install the package on your instance.

        Preparing for AEM Developer Certification Exam -- July 2016 Session of Ask the AEM Communtiy Experts

        $
        0
        0
        Watch Scott Macdonald and  James Talbot's session on preparing for the AEM 6 Developer Certification Exam. This session will discuss how to prepare for the developer exam and cover areas that a developer whom is writing the exam is expected to know. If you are planning on writing the AEM Dev Exam, this is a session you want to attend.
        To watch this session, click here
        Viewing all 162 articles
        Browse latest View live


        <script src="https://jsc.adskeeper.com/r/s/rssing.com.1596347.js" async> </script>