Quantcast
Channel: AEM Guide
Viewing all 162 articles
Browse latest View live

Lazybones - Project Creation Tool

$
0
0
Lazybones was born out of frustration that Ratpack does not and will not have a command line tool that will bootstrap a project. It's a good decision for Ratpack, but I'm lazy and want tools to do the boring stuff for me.
The tool is very simple: it allows you to create a new project structure for any framework or library for which the tool has a template. You can even contribute templates by sending pull requests to this GitHub project or publishing the packages to the relevant Bintray repository (more info available below).
The concept of Lazybones is very similar to Maven archetypes, and what Yeoman does for web applications. Lazybones also includes a sub templates feature that resembles the behaviour of Yeoman's sub-generators, allowing you to generate optional extras (controllers, scaffolding etc.) inside a project.

AEM: design and preview mode toolbar not visible

$
0
0
Issue
If you are using the sidekick on an author instance of CQ, you may notice that the toolbar at the bottom which includes the design and preview mode buttons, is not visible or available.
Reason
The functionality in the sidekick is determined by the ACLs (Access-Control-Lists) defined in the CQ server.  If you do not have the appropriate privileges then functionality may be hidden in your sidekick.  Sometimes the sidekick may become unstable if you add faulty components to the page, or after you have installed some packages that may have overwritten required objects in your application, breaking some dependencies.

Solution
You should first try to clear your browser cache, and then reload the page from WCM console to refresh the sidekick.
You should also ensure you have the correct privileges to access the appropriate design in /etc/designs.  This can be changed by an administrator on the Users tab in the siteadmin console.  If the privileges appear to be correct, then try to disable them, save, and then re-enable them and save.  The sidekick should now display the toolbar again as expected.

To display the design button on the sidekick enable Modify permission for etc path.


Adobe Salesforce Connector - INVALID_SESSION_ID

$
0
0

Issue:

I have integrated AEM with Salesforce using salesforce cloud config. I am able to connect to salesforce successfully and able to pull data from salesforce. After sometime when I access aem page am getting error below
[{"message":"Session expired or invalid","errorCode":"INVALID_SESSION_ID"}]
I have also checked below settings in salesforce
  • Session timeout after 4 hours of inactivity
  • Selecte OAuth scopes
    •  Perform requests on your behalf at any time (refresh_token, offline_access)
    • Access and manage your data (api)
    • Full Access (Full)

Resolution:

In sales force we need to remove Full Access (Full) OAuth Scopes, if we use this then refresh token will not be effective.

Cannot create maven project

$
0
0
When trying to create maven project using multi module content package archetype we may get exception

Maven command to create project:

mvn archetype:generate -DarchetypeRepository=https://repo.adobe.com/nexus/content/groups/public/ -DarchetypeGroupId=com.day.jcr.vault -DarchetypeArtifactId=multimodule-content-package-archetype -DarchetypeVersion=1.0.2 -DgroupId=com.mycompany.myproject.htl -DartifactId=htl -Dversion=1.0-SNAPSHOT -Dpackage=com.mycompany.myproject.htl -DappsFolderName=myproject -DartifactName="My Project" -DcqVersion="5.6.1" -DpackageGroup="My Company"

Exception:

Caused by: org.apache.maven.plugin.MojoFailureException: The desired archetype does not exist (com.day.jcr.vault:multimodule-content-package-archetype

Resolution:

Check the settings.xml under .m2 folder.
Below is the sample settings.xml
<?xml version="1.0" encoding="UTF-8"?>

<!--
Licensed to the Apache Software Foundation (ASF) under one
or more contributor license agreements. See the NOTICE file
distributed with this work for additional information
regarding copyright ownership. The ASF licenses this file
to you under the Apache License, Version 2.0 (the
"License"); you may not use this file except in compliance
with the License. You may obtain a copy of the License at

http://www.apache.org/licenses/LICENSE-2.0

Unless required by applicable law or agreed to in writing,
software distributed under the License is distributed on an
"AS IS" BASIS, WITHOUT WARRANTIES OR CONDITIONS OF ANY
KIND, either express or implied. See the License for the
specific language governing permissions and limitations
under the License.
-->


<!--
| This is the configuration file for Maven. It can be specified at two levels:
|
| 1. User Level. This settings.xml file provides configuration for a single user,
| and is normally provided in ${user.home}/.m2/settings.xml.
|
| NOTE: This location can be overridden with the CLI option:
|
| -s /path/to/user/settings.xml
|
| 2. Global Level. This settings.xml file provides configuration for all Maven
| users on a machine (assuming they're all using the same Maven
| installation). It's normally provided in
| ${maven.home}/conf/settings.xml.
|
| NOTE: This location can be overridden with the CLI option:
|
| -gs /path/to/global/settings.xml
|
| The sections in this sample file are intended to give you a running start at
| getting the most out of your Maven installation. Where appropriate, the default
| values (values used when the setting is not specified) are provided.
|
|-->

<settings xmlns="http://maven.apache.org/SETTINGS/1.0.0"
xmlns:xsi="http://www.w3.org/2001/XMLSchema-instance"
xsi:schemaLocation="http://maven.apache.org/SETTINGS/1.0.0 http://maven.apache.org/xsd/settings-1.0.0.xsd">

<!-- localRepository
| The path to the local repository maven will use to store artifacts.
|
| Default: ~/.m2/repository
<localRepository>/path/to/local/repo</localRepository>
-->


<!-- interactiveMode
| This will determine whether maven prompts you when it needs input. If set to false,
| maven will use a sensible default value, perhaps based on some other setting, for
| the parameter in question.
|
| Default: true
<interactiveMode>true</interactiveMode>
-->


<!-- offline
| Determines whether maven should attempt to connect to the network when executing a build.
| This will have an effect on artifact downloads, artifact deployment, and others.
|
| Default: false
<offline>false</offline>
-->


<!-- pluginGroups
| This is a list of additional group identifiers that will be searched when resolving plugins by their prefix, i.e.
| when invoking a command line like "mvn prefix:goal". Maven will automatically add the group identifiers
| "org.apache.maven.plugins" and "org.codehaus.mojo" if these are not already contained in the list.
|-->

<pluginGroups>
<!-- pluginGroup
| Specifies a further group identifier to use for plugin lookup.
<pluginGroup>com.your.plugins</pluginGroup>
-->

</pluginGroups>

<!-- proxies
| This is a list of proxies which can be used on this machine to connect to the network.
| Unless otherwise specified (by system property or command-line switch), the first proxy
| specification in this list marked as active will be used.
|-->

<proxies>
<!-- proxy
| Specification for one proxy, to be used in connecting to the network.
|
<proxy>
<id>optional</id>
<active>true</active>
<protocol>http</protocol>
<username>proxyuser</username>
<password>proxypass</password>
<host>proxy.host.net</host>
<port>80</port>
<nonProxyHosts>local.net|some.host.com</nonProxyHosts>
</proxy>
-->

</proxies>

<!-- servers
| This is a list of authentication profiles, keyed by the server-id used within the system.
| Authentication profiles can be used whenever maven must make a connection to a remote server.
|-->

<servers>
<!-- server
| Specifies the authentication information to use when connecting to a particular server, identified by
| a unique name within the system (referred to by the 'id' attribute below).
|
| NOTE: You should either specify username/password OR privateKey/passphrase, since these pairings are
| used together.
|
<server>
<id>deploymentRepo</id>
<username>repouser</username>
<password>repopwd</password>
</server>
-->


<!-- Another sample, using keys to authenticate.
<server>
<id>siteServer</id>
<privateKey>/path/to/private/key</privateKey>
<passphrase>optional; leave empty if not used.</passphrase>
</server>
-->

</servers>

<!-- mirrors
| This is a list of mirrors to be used in downloading artifacts from remote repositories.
|
| It works like this: a POM may declare a repository to use in resolving certain artifacts.
| However, this repository may have problems with heavy traffic at times, so people have mirrored
| it to several places.
|
| That repository definition will have a unique id, so we can create a mirror reference for that
| repository, to be used as an alternate download site. The mirror site will be the preferred
| server for that repository.
|-->

<mirrors>
<!-- mirror
| Specifies a repository mirror site to use instead of a given repository. The repository that
| this mirror serves has an ID that matches the mirrorOf element of this mirror. IDs are used
| for inheritance and direct lookup purposes, and must be unique across the set of mirrors.
|
<mirror>
<id>mirrorId</id>
<mirrorOf>repositoryId</mirrorOf>
<name>Human Readable Name for this Mirror.</name>
<url>http://my.repository.com/repo/path</url>
</mirror>
-->

</mirrors>

<!-- profiles
| This is a list of profiles which can be activated in a variety of ways, and which can modify
| the build process. Profiles provided in the settings.xml are intended to provide local machine-
| specific paths and repository locations which allow the build to work in the local environment.
|
| For example, if you have an integration testing plugin - like cactus - that needs to know where
| your Tomcat instance is installed, you can provide a variable here such that the variable is
| dereferenced during the build process to configure the cactus plugin.
|
| As noted above, profiles can be activated in a variety of ways. One way - the activeProfiles
| section of this document (settings.xml) - will be discussed later. Another way essentially
| relies on the detection of a system property, either matching a particular value for the property,
| or merely testing its existence. Profiles can also be activated by JDK version prefix, where a
| value of '1.4' might activate a profile when the build is executed on a JDK version of '1.4.2_07'.
| Finally, the list of active profiles can be specified directly from the command line.
|
| NOTE: For profiles defined in the settings.xml, you are restricted to specifying only artifact
| repositories, plugin repositories, and free-form properties to be used as configuration
| variables for plugins in the POM.
|
|-->

<profiles>
<!-- profile
| Specifies a set of introductions to the build process, to be activated using one or more of the
| mechanisms described above. For inheritance purposes, and to activate profiles via <activatedProfiles/>
| or the command line, profiles have to have an ID that is unique.
|
| An encouraged best practice for profile identification is to use a consistent naming convention
| for profiles, such as 'env-dev', 'env-test', 'env-production', 'user-jdcasey', 'user-brett', etc.
| This will make it more intuitive to understand what the set of introduced profiles is attempting
| to accomplish, particularly when you only have a list of profile id's for debug.
|
| This profile example uses the JDK version to trigger activation, and provides a JDK-specific repo.
<profile>
<id>jdk-1.4</id>

<activation>
<jdk>1.4</jdk>
</activation>

<repositories>
<repository>
<id>jdk14</id>
<name>Repository for JDK 1.4 builds</name>
<url>http://www.myhost.com/maven/jdk14</url>
<layout>default</layout>
<snapshotPolicy>always</snapshotPolicy>
</repository>
</repositories>
</profile>
-->


<!--
| Here is another profile, activated by the system property 'target-env' with a value of 'dev',
| which provides a specific path to the Tomcat instance. To use this, your plugin configuration
| might hypothetically look like:
|
| ...
| <plugin>
| <groupId>org.myco.myplugins</groupId>
| <artifactId>myplugin</artifactId>
|
| <configuration>
| <tomcatLocation>${tomcatPath}</tomcatLocation>
| </configuration>
| </plugin>
| ...
|
| NOTE: If you just wanted to inject this configuration whenever someone set 'target-env' to
| anything, you could just leave off the <value/> inside the activation-property.
|
<profile>
<id>env-dev</id>

<activation>
<property>
<name>target-env</name>
<value>dev</value>
</property>
</activation>

<properties>
<tomcatPath>/path/to/tomcat/instance</tomcatPath>
</properties>
</profile>
-->


<profile>

<id>adobe-public</id>

<activation>

<activeByDefault>true</activeByDefault>

</activation>

<repositories>

<repository>

<id>adobe</id>

<name>Nexus Proxy Repository</name>

<url>http://repo.adobe.com/nexus/content/groups/public/</url>

<layout>default</layout>

</repository>

</repositories>

<pluginRepositories>

<pluginRepository>

<id>adobe</id>

<name>Nexus Proxy Repository</name>

<url>http://repo.adobe.com/nexus/content/groups/public/</url>

<layout>default</layout>

</pluginRepository>

</pluginRepositories>

</profile>

</profiles>

<!-- activeProfiles
| List of profiles that are active for all builds.
|
<activeProfiles>
<activeProfile>alwaysActiveProfile</activeProfile>
<activeProfile>anotherAlwaysActiveProfile</activeProfile>
</activeProfiles>
-->

</settings>

Deploy AEM bundles and packages using Maven

$
0
0

Setup Maven

You can use Maven to build an OSGi bundle that uses the QueryBuilder API and is deployed to Experiene Manager. Maven manages required JAR files that a Java project needs in its class path. Instead of searching the Internet trying to find and download third-party JAR files to include in your project’s class path, Maven manages these dependencies for you.
You can download Maven 3 from the following URL:
After you download and extract Maven, create an environment variable named M3_HOME. Assign the Maven install location to this environment variable. For example:
C:\Programs\Apache\apache-maven-3.0.4
Set up a system environment variable to reference Maven. To test whether you properly setup Maven, enter the following Maven command into a command prompt:
%M3_HOME%\bin\mvn -version
This command provides Maven and Java install details and resembles the following message:
OS name: "windows 7", version: "6.1", arch: "amd64", family: "windows"

Note:
For more information about setting up Maven and the Home variable, see: Maven in 5 Minutes.
Next, copy the Maven configuration file named settings.xml from [install location]\apache-maven-3.0.4\conf\ to your user profile. For example, C:\Users\scottm\.m2\.
You have to configure your settings.xml file to use Adobe’s public repository. For information, see Adobe Public Maven Repository at http://repo.adobe.com/.
The following XML code represents a settings.xml file that you can use.
<?xml version="1.0" encoding="UTF-8"?>

<!--
Licensed to the Apache Software Foundation (ASF) under one
or more contributor license agreements. See the NOTICE file
distributed with this work for additional information
regarding copyright ownership. The ASF licenses this file
to you under the Apache License, Version 2.0 (the
"License"); you may not use this file except in compliance
with the License. You may obtain a copy of the License at

http://www.apache.org/licenses/LICENSE-2.0

Unless required by applicable law or agreed to in writing,
software distributed under the License is distributed on an
"AS IS" BASIS, WITHOUT WARRANTIES OR CONDITIONS OF ANY
KIND, either express or implied. See the License for the
specific language governing permissions and limitations
under the License.
-->


<!--
| This is the configuration file for Maven. It can be specified at two levels:
|
| 1. User Level. This settings.xml file provides configuration for a single user,
| and is normally provided in ${user.home}/.m2/settings.xml.
|
| NOTE: This location can be overridden with the CLI option:
|
| -s /path/to/user/settings.xml
|
| 2. Global Level. This settings.xml file provides configuration for all Maven
| users on a machine (assuming they're all using the same Maven
| installation). It's normally provided in
| ${maven.home}/conf/settings.xml.
|
| NOTE: This location can be overridden with the CLI option:
|
| -gs /path/to/global/settings.xml
|
| The sections in this sample file are intended to give you a running start at
| getting the most out of your Maven installation. Where appropriate, the default
| values (values used when the setting is not specified) are provided.
|
|-->

<settings xmlns="http://maven.apache.org/SETTINGS/1.0.0"
xmlns:xsi="http://www.w3.org/2001/XMLSchema-instance"
xsi:schemaLocation="http://maven.apache.org/SETTINGS/1.0.0 http://maven.apache.org/xsd/settings-1.0.0.xsd">

<!-- localRepository
| The path to the local repository maven will use to store artifacts.
|
| Default: ~/.m2/repository
<localRepository>/path/to/local/repo</localRepository>
-->


<!-- interactiveMode
| This will determine whether maven prompts you when it needs input. If set to false,
| maven will use a sensible default value, perhaps based on some other setting, for
| the parameter in question.
|
| Default: true
<interactiveMode>true</interactiveMode>
-->


<!-- offline
| Determines whether maven should attempt to connect to the network when executing a build.
| This will have an effect on artifact downloads, artifact deployment, and others.
|
| Default: false
<offline>false</offline>
-->


<!-- pluginGroups
| This is a list of additional group identifiers that will be searched when resolving plugins by their prefix, i.e.
| when invoking a command line like "mvn prefix:goal". Maven will automatically add the group identifiers
| "org.apache.maven.plugins" and "org.codehaus.mojo" if these are not already contained in the list.
|-->

<pluginGroups>
<!-- pluginGroup
| Specifies a further group identifier to use for plugin lookup.
<pluginGroup>com.your.plugins</pluginGroup>
-->

</pluginGroups>

<!-- proxies
| This is a list of proxies which can be used on this machine to connect to the network.
| Unless otherwise specified (by system property or command-line switch), the first proxy
| specification in this list marked as active will be used.
|-->

<proxies>
<!-- proxy
| Specification for one proxy, to be used in connecting to the network.
|
<proxy>
<id>optional</id>
<active>true</active>
<protocol>http</protocol>
<username>proxyuser</username>
<password>proxypass</password>
<host>proxy.host.net</host>
<port>80</port>
<nonProxyHosts>local.net|some.host.com</nonProxyHosts>
</proxy>
-->

</proxies>

<!-- servers
| This is a list of authentication profiles, keyed by the server-id used within the system.
| Authentication profiles can be used whenever maven must make a connection to a remote server.
|-->

<servers>
<!-- server
| Specifies the authentication information to use when connecting to a particular server, identified by
| a unique name within the system (referred to by the 'id' attribute below).
|
| NOTE: You should either specify username/password OR privateKey/passphrase, since these pairings are
| used together.
|
<server>
<id>deploymentRepo</id>
<username>repouser</username>
<password>repopwd</password>
</server>
-->


<!-- Another sample, using keys to authenticate.
<server>
<id>siteServer</id>
<privateKey>/path/to/private/key</privateKey>
<passphrase>optional; leave empty if not used.</passphrase>
</server>
-->

</servers>

<!-- mirrors
| This is a list of mirrors to be used in downloading artifacts from remote repositories.
|
| It works like this: a POM may declare a repository to use in resolving certain artifacts.
| However, this repository may have problems with heavy traffic at times, so people have mirrored
| it to several places.
|
| That repository definition will have a unique id, so we can create a mirror reference for that
| repository, to be used as an alternate download site. The mirror site will be the preferred
| server for that repository.
|-->

<mirrors>
<!-- mirror
| Specifies a repository mirror site to use instead of a given repository. The repository that
| this mirror serves has an ID that matches the mirrorOf element of this mirror. IDs are used
| for inheritance and direct lookup purposes, and must be unique across the set of mirrors.
|
<mirror>
<id>mirrorId</id>
<mirrorOf>repositoryId</mirrorOf>
<name>Human Readable Name for this Mirror.</name>
<url>http://my.repository.com/repo/path</url>
</mirror>
-->

</mirrors>

<!-- profiles
| This is a list of profiles which can be activated in a variety of ways, and which can modify
| the build process. Profiles provided in the settings.xml are intended to provide local machine-
| specific paths and repository locations which allow the build to work in the local environment.
|
| For example, if you have an integration testing plugin - like cactus - that needs to know where
| your Tomcat instance is installed, you can provide a variable here such that the variable is
| dereferenced during the build process to configure the cactus plugin.
|
| As noted above, profiles can be activated in a variety of ways. One way - the activeProfiles
| section of this document (settings.xml) - will be discussed later. Another way essentially
| relies on the detection of a system property, either matching a particular value for the property,
| or merely testing its existence. Profiles can also be activated by JDK version prefix, where a
| value of '1.4' might activate a profile when the build is executed on a JDK version of '1.4.2_07'.
| Finally, the list of active profiles can be specified directly from the command line.
|
| NOTE: For profiles defined in the settings.xml, you are restricted to specifying only artifact
| repositories, plugin repositories, and free-form properties to be used as configuration
| variables for plugins in the POM.
|
|-->

<profiles>
<!-- profile
| Specifies a set of introductions to the build process, to be activated using one or more of the
| mechanisms described above. For inheritance purposes, and to activate profiles via <activatedProfiles/>
| or the command line, profiles have to have an ID that is unique.
|
| An encouraged best practice for profile identification is to use a consistent naming convention
| for profiles, such as 'env-dev', 'env-test', 'env-production', 'user-jdcasey', 'user-brett', etc.
| This will make it more intuitive to understand what the set of introduced profiles is attempting
| to accomplish, particularly when you only have a list of profile id's for debug.
|
| This profile example uses the JDK version to trigger activation, and provides a JDK-specific repo.
<profile>
<id>jdk-1.4</id>

<activation>
<jdk>1.4</jdk>
</activation>

<repositories>
<repository>
<id>jdk14</id>
<name>Repository for JDK 1.4 builds</name>
<url>http://www.myhost.com/maven/jdk14</url>
<layout>default</layout>
<snapshotPolicy>always</snapshotPolicy>
</repository>
</repositories>
</profile>
-->


<!--
| Here is another profile, activated by the system property 'target-env' with a value of 'dev',
| which provides a specific path to the Tomcat instance. To use this, your plugin configuration
| might hypothetically look like:
|
| ...
| <plugin>
| <groupId>org.myco.myplugins</groupId>
| <artifactId>myplugin</artifactId>
|
| <configuration>
| <tomcatLocation>${tomcatPath}</tomcatLocation>
| </configuration>
| </plugin>
| ...
|
| NOTE: If you just wanted to inject this configuration whenever someone set 'target-env' to
| anything, you could just leave off the <value/> inside the activation-property.
|
<profile>
<id>env-dev</id>

<activation>
<property>
<name>target-env</name>
<value>dev</value>
</property>
</activation>

<properties>
<tomcatPath>/path/to/tomcat/instance</tomcatPath>
</properties>
</profile>
-->


<profile>

<id>adobe-public</id>

<activation>

<activeByDefault>true</activeByDefault>

</activation>

<repositories>

<repository>

<id>adobe</id>

<name>Nexus Proxy Repository</name>

<url>http://repo.adobe.com/nexus/content/groups/public/</url>

<layout>default</layout>

</repository>

</repositories>

<pluginRepositories>

<pluginRepository>

<id>adobe</id>

<name>Nexus Proxy Repository</name>

<url>http://repo.adobe.com/nexus/content/groups/public/</url>

<layout>default</layout>

</pluginRepository>

</pluginRepositories>

</profile>

</profiles>

<!-- activeProfiles
| List of profiles that are active for all builds.
|
<activeProfiles>
<activeProfile>alwaysActiveProfile</activeProfile>
<activeProfile>anotherAlwaysActiveProfile</activeProfile>
</activeProfiles>
-->

</settings>

Create an Experience Manage archetype project 
To create an AEM bundle archetype project, perform these steps:
1. Open the command prompt and go to your working directory (for example, C:\AdobeCQ).
2. Run the following Maven command:
mvn archetype:generate 
-DarchetypeRepository=https://repo.adobe.com/nexus/content/groups/public/
-DarchetypeGroupId=com.day.jcr.vault -DarchetypeArtifactId=multimodule-content-package-archetype
-DarchetypeVersion=1.0.2-DgroupId=com.aem.kishore -DartifactId=aem-sample -Dversion=1.0-SNAPSHOT
-Dpackage=com.aem.kishore -DappsFolderName=aem-sample -DartifactName="aem-sample"-DcqVersion="6.1"-DpackageGroup="aem-sample"

3. When prompted for additional information, specify Y.
4. Once done, you will see a message like:
[INFO] Finished at: Wed Mar 27 13:38:58 EDT 2013
[INFO] Final Memory: 10M/184M
5. Change the command prompt to the generated project. For example: C:\AdobeCQ\htl. Run the following Maven command:
mvn eclipse:eclipse


Goto parent pom.xml and add the modules, make sure aem-sample-all module is at bottom)

<modules>
<module>aem-bundle-core</module>
<module>aem-content-ui</module>
<module>aem-sample-all</module>
</modules>

Add the vault plugin in the parent pom.xml
<plugin>
<groupId>com.day.jcr.vault</groupId>
<artifactId>maven-vault-plugin</artifactId>
<version>0.0.10</version>
<configuration>
<verbose>true</verbose>
</configuration>
</plugin>

In each bundle module's(e.g. aem-sample/aem-bundle-core) pom.xml add the following configuration
<properties>
<skip.install>false</skip.install>
</properties>

<profiles>
<profile>
<id>buildOnly</id>
<properties>
<skip.install>true</skip.install>
</properties>
</profile>
</profiles>

Modify the maven-sling-plugin in individual bundle modules pom.xml as shown below
<plugin>
<groupId>org.apache.sling</groupId>
<artifactId>maven-sling-plugin</artifactId>
<executions>
<execution>
<id>install-bundle</id>
<goals>
<goal>install</goal>
</goals>
<configuration>
<slingUrl>${cq.protocol}://${cq.host}:${cq.port}/system/console/bundles
</slingUrl>
<user>${cq.user}</user>
<password>${cq.password}</password>
<refreshPackages>true</refreshPackages>
<failOnError>true</failOnError>
<skip>${skip.install}</skip>
</configuration>
</execution>
</executions>
</plugin>

In each content modules (e.g. aem-sample/aem-content-ui) pom.xml add the following configuration
<properties>
<skip.goal>install</skip.goal>
</properties>

Add as part of the profiles
<profile>
<id>buildOnly</id>
<properties>
<skip.goal>build</skip.goal>
</properties>
</profile>

Remove the profiles autoInstallPackage and autoInstallPackagePublish from content modules(e.g aem-sample/aem-content-ui/pom.xml - the deployment to the publisher is taken care from aem-sample-all/pom.xml).
Configure the content-package-maven-plugin as shown below
<plugin>
<groupId>com.day.jcr.vault</groupId>
<artifactId>content-package-maven-plugin</artifactId>
<configuration>
<name>cq-sample-content</name>
<useProxy>false</useProxy>
<failOnError>true</failOnError>
<packageFile>${project.build.directory}/${project.build.finalName}.zip</packageFile>
<targetURL>${cq.protocol}://${cq.host}:${cq.port}/crx/packmgr/service.jsp</targetURL>
<userId>${cq.user}</userId>
<password>${cq.password}</password>
</configuration>
<executions>
<execution>
<goals>
<goal>${skip.goal}</goal>
</goals>
</execution>
</executions>
</plugin>

Add the below server configuration with admin username and password to Maven settings.xml(repeat the same for all the configured servers in aem-sample-all/pom.xml)
<server>
<id>aem-dev-author</id>
<username>admin</username>
<password>admin</password>
</server>

Create cq-sample-all/pom.xml and configure the environment specific properties, module dependencies and different profiles - refer the sample below
Configure environment specific properties, module dependencies and different profiles in aem-sample-all/pom.xml.
<?xml version="1.0" encoding="UTF-8"?>
<project xmlns="http://maven.apache.org/POM/4.0.0" xmlns:xsi="http://www.w3.org/2001/XMLSchema-instance" xsi:schemaLotrion="http://maven.apache.org/POM/4.0.0 http://maven.apache.org/maven-v4_0_0.xsd">

<modelVersion>4.0.0</modelVersion>
<parent>
<groupId>my-group-id</groupId><!-- Change the groupid and artifactId of the paraent -->
<artifactId>cq-sample</artifactId>
<version>1.0-SNAPSHOT</version>
</parent>

<artifactId>cq-sample-all</artifactId><!-- Change the artifcatId -->
<packaging>content-package</packaging>
<name>${project.groupId} - ${project.artifactId}</name>

<properties>
<cq.dev.author.server>aem-dev-author</cq.dev.author.server>
<cq.dev.author.host>localhost</cq.dev.author.host>
<cq.dev.author.port>4502</cq.dev.author.port>
<cq.dev.author.protocol>http</cq.dev.author.protocol>

<cq.dev.publisher1.server>aem-dev-publisher</cq.dev.publisher1.server>
<cq.dev.publisher1.host>localhost</cq.dev.publisher1.host>
<cq.dev.publisher1.port>4503</cq.dev.publisher1.port>
<cq.dev.publisher1.protocol>http</cq.dev.publisher1.protocol>

<!-- Add the other server details-->

</properties>

<!-- Add all the bundle/content modules as part of dependency. Change the artifactId of the modules-->

<dependencies>
<dependency>
<groupId>${project.groupId}</groupId>
<artifactId>cq-sample-content</artifactId>
<version>${project.version}</version>
<type>content-package</type>
</dependency>
<dependency>
<groupId>${project.groupId}</groupId>
<artifactId>cq-sample-bundle</artifactId>
<version>${project.version}</version>
</dependency>
</dependencies>

<build>
<plugins>
<plugin>
<groupId>com.day.jcr.vault</groupId>
<artifactId>maven-vault-plugin</artifactId>
<extensions>true</extensions>
<executions>
<execution>
<goals>
<goal>package</goal>
</goals>
<configuration>
<embeddedTarget>/apps/cq-sample/install</embeddedTarget><!-- change the folder name(cq-sample) accordingly -->
<embeddeds>
<embedded>
<groupId>${project.groupId}</groupId>
<artifactId>cq-sample-bundle</artifactId>
<filter>true</filter>
</embedded>
<!-- Add additional bundle modules here as embedded -->
</embeddeds>
<subPackages>
<subPackage>
<groupId>${project.groupId}</groupId>
<artifactId>cq-sample-content</artifactId>
<filter>true</filter>
</subPackage>

<!-- Add additional content modules here as subPackage -->
</subPackages>
</configuration>
</execution>
</executions>
</plugin>
</plugins>
</build>

<profiles>
<!-- Profile for Development deployments -->
<!--Create the profile for different environments -->
<profile>
<id>Development</id>
<build>
<plugins>
<plugin>
<groupId>com.day.jcr.vault</groupId>
<artifactId>content-package-maven-plugin</artifactId>
<executions>
<execution>
<id>install-content-package-author</id>
<phase>install</phase>
<goals>
<goal>install</goal>
</goals>
<configuration>
<failOnError>true</failOnError>
<useProxy>false</useProxy>
<packageFile>${project.build.directory}/${project.build.finalName}.zip</packageFile>
<targetURL>${cq.dev.author.protocol}://${cq.dev.author.host}:${cq.dev.author.port}/crx/packmgr/service.jsp</targetURL>
<serverId>${cq.dev.author.server}</serverId>
</configuration>
</execution>
<execution>
<id>install-content-package-publisher1</id>
<phase>install</phase>
<goals>
<goal>install</goal>
</goals>
<configuration>
<failOnError>true</failOnError>
<useProxy>false</useProxy>
<packageFile>${project.build.directory}/${project.build.finalName}.zip</packageFile>
<targetURL>${cq.dev.publisher1.protocol}://${cq.dev.publisher1.host}:${cq.dev.publisher1.port}/crx/packmgr/service.jsp</targetURL>
<serverId>${cq.dev.publisher1.server}</serverId>
</configuration>
</execution>

<!-- Add execution for additional publisher with different id(increment the last digit)-->

</executions>
</plugin>
</plugins>
</build>
</profile>
</profiles>
</project>

Run the build by providing the following command (parent pom.xml)
mvn clean package install -PbuildOnly,Development 

Development is the profile name configured in aem-sample-all/pom.xml.

To deploy the individual modules to author or publisher Replace the default server properties from the parent pom.xml 

Development is the profile name configured in aem-sample-all/pom.xml.
To deploy the individual modules to author or publisher replace the default server properties from the parent pom.xml 

<crx.host>localhost</crx.host>
<crx.port>4502</crx.port>
<crx.username>admin</crx.username>
<crx.password>admin</crx.password>
<publish.crx.host>localhost</publish.crx.host>
<publish.crx.port>4503</publish.crx.port>
<publish.crx.username>admin</publish.crx.username> <publish.crx.password>admin</publish.crx.password>

 with
<cq.protocol>http</cq.protocol>
<cq.host>localhost</cq.host>
<cq.port>4502</cq.port>
<cq.username>admin</cq.username>
<cq.password>admin</cq.password>

Change the server details in the properties in the parent pom.xml with author or publisher- aem-sample/pom.xml and run the individual module pom.xml (mvn clean install) to deploy the individual modules.

Different ways to get AEM admin session

$
0
0

Method 1:

AEM admin session can be obtained using below method but this is deprecated


@Reference
privateSlingRepository repository;
adminSession = repository.loginAdministrative(null);


Method 2:

Another way to get the session (not the recommended way)
Session session = repository.login(new SimpleCredentials("admin",
"admin".toCharArray()),"crx.default");

Method 3:

@Reference
publicResourceResolverFactory rrFactory;

ResourceResolver adminResolver = rrFactory.getAdministrativeResourceResolver(null);
Session adminSession = adminResolver.adaptTo(Session.class);

Method 4:

Map<String, Object> param =new HashMap<String, Object>();
param.put(ResourceResolverFactory.SUBSERVICE, "jqom");
ResourceResolver resolver =null;
try {
//Invoke the getServiceResourceResolver method to create a Session instance
resolver = resolverFactory.getServiceResourceResolver(param);
session = resolver.adaptTo(Session.class);
}

See Community Article

Method 5:

You can create a user and assign it to the administrative group and use it's credentials rather than the default admin user.
You may also want to take a look at this article which goes over using the correct resource resolver in AEM 6.

Integrate AEM with Docusign - Part 1

$
0
0

Integrate AEM with Docusign to get Docusign account information

What is Docusign?

DocuSign® is The Global Standard for Digital Transaction Management. Accessible anytime, anywhere on any device, global enterprises, business departments, individual professionals, and consumers in all industries solve their paper problems by replacing manual, paper-based methods with DocuSign. The result is accelerated transactions that increase speed to results, reduce costs, improve visibility and control, and delight customers. DocuSign helps you keep business digital with the easiest, fastest, most secure way to send, sign, manage and store documents in the cloud.

Why Docusign?


Sample servlet code to get Docusign account information.

packagecom.kishore.salesforce.docusign;

/**
* Docusign integration
*/

importjava.io.BufferedReader;
importjava.io.InputStreamReader;

importorg.apache.http.HttpHost;
importorg.apache.http.HttpResponse;
importorg.apache.http.client.HttpClient;
importorg.apache.http.client.methods.HttpGet;
importorg.apache.http.conn.params.ConnRoutePNames;
importorg.apache.http.impl.client.DefaultHttpClient;
importorg.apache.sling.commons.json.JSONException;
importorg.apache.sling.commons.json.JSONObject;
importorg.slf4j.Logger;
importorg.slf4j.LoggerFactory;

@Component(name ="com.kishore.salesforce.docusign.GetDocusignAccountInfo", label ="AEM Docusign - GetDocusignAccountInfo", immediate =true, metatype =true)
@Service
@Properties({ @Property(name ="service.description", value ="Get Docusign Account Info"),
@Property(name ="service.vendor", value ="AEM Quickstart"),
@Property(name ="docuserviceurl", value ="https://demo.docusign.net/restapi/v2/login_information"),
@Property(name ="docuusername", value ="xxxxx@gmail.com"),
@Property(name ="docupassword", value ="XXXXXX"),
@Property(name ="sling.servlet.paths", value ="/services/docusign/GetDocusignAccountInfo", propertyPrivate =true),
@Property(name ="sling.servlet.methods", value ="POST"),
@Property(name ="integratorkey", value ="xxxxxx-xxxxxx-xxxxxx-xxxxxx-xxxxxx") })
publicclassGetDocusignAccountInfoextendsSlingAllMethodsServletimplementsSerializable{

/** The log. */
privateLogger log =LoggerFactory.getLogger(GetDocusignAccountInfo.class);

/**
*
*/

privatestaticfinallong serialVersionUID =1L;

privateString serviceUrl;
privateString serviceBaseUrl;
privateString userName;
privateString password;
privateString integratorkey;
privateString proxyurl;
privateString proxyport;
privateString accountid;

protectedvoiddoGet(SlingHttpServletRequestrequest,
SlingHttpServletResponseresponse) throwsServletException
{
doPost(request, response);
}

publicvoiddoPost(SlingHttpServletRequestrequest, SlingHttpServletResponseresponse) throwsServletException {
log.info("doPost Started");
log.info("serviceUrl :"+ serviceUrl);
log.info("userName"+ userName);
log.info("password "+ password);
log.info("integratorkey:"+ integratorkey);
log.info("serviceBaseUrl: "+serviceBaseUrl);
JSONObject obj =newJSONObject();
String finalUrl=null;
try {
obj.put("Username", userName);
obj.put("Password", password);
obj.put("IntegratorKey", integratorkey);
HttpClient httpClient =newDefaultHttpClient();
HttpGet getRequest =newHttpGet(serviceUrl);
HttpHost proxy =newHttpHost(proxyurl, Integer.parseInt(proxyport));
httpClient.getParams().setParameter(ConnRoutePNames.DEFAULT_PROXY, proxy);
getRequest.addHeader("X-DocuSign-Authentication", obj.toString());
HttpResponse responseHttp = httpClient.execute(getRequest);
log.info("Status Code"+ response.getStatusLine().getStatusCode());
BufferedReader rd =newBufferedReader(newInputStreamReader(response.getEntity().getContent()));
StringBuffer result =newStringBuffer();
String line ="";
while ((line = rd.readLine()) !=null) {
result.append(line);
}
log.info("Docusgin Account details: "+result);

response.setContentType("text/html");
response.getWriter().write(result.toString());

} catch (JSONException e) {
log.error("Json Exception details :"+ e.toString());
} catch (Exception e) {
log.error("Exception details :"+ e.toString());
}
log.info("doPost Ended");

}

/**
* default activate method.
*
* @param context
* the context
* @throws Exception
* the exception
*/

@Activate
protectedvoidactivate(ComponentContextcontext) throwsException {
log.info("activate method called");
@SuppressWarnings("rawtypes")
Dictionary properties = context.getProperties();
serviceUrl = (String) properties.get("docuserviceurl");
userName = (String) properties.get("docuusername");
password = (String) properties.get("docupassword");
integratorkey = (String) properties.get("integratorkey");

}
}

Sample Response:

{
"loginAccounts": [
{
"name":"AEM Quickstart",
"accountId":"XXXXX",
"baseUrl":"https://demo.docusign.net/restapi/v2/accounts/XXXXXX",
"isDefault":"true",
"userName":"kishore polsani",
"userId":"XXXX-XXXX-XXXXX-XXXXX",
"email":"kishore.polsani@gmail.com",
"siteDescription":""
}
]
}


Hashmap in Sightly / HTL

$
0
0
Use hashmap in sightly / HTL

WCMUsePojo code
packagecom.kishore.sightly;

publicclassGetMapextendsWCMUsePojo {
Map<String, String> myMap =null;
@Override
publicvoidactivate() throwsException {
myMap =newHashMap<String, String>();
myMap.put("name", "Kishore");
}

publicMap<String, String>getmyMap() {
return myMap;
}
}

HTL code

<sly data-sly-use.model="com.kishore.sightly.GetMap" />

Name: ${model.myMap['name']}

Get docusign recipient link in AEM

$
0
0
To generate the recipient signing URL call the EnvelopeViews: createRecipientmethod, using the same identifying recipient information - including the clientUserId - that was sent with envelope. To do this make an http POST request to the following endpoint:


POST/accounts/{accountId}/envelopes/{envelopeId}/views/recipient
With the following request body:
{
"userName": "Kishore Polsani",
"email": "kishore.polsani@gmail.com",
"recipientId": "1",
"clientUserId": "1111",
"authenticationMethod": "email",
"returnUrl": "https://www.docusign.com/devcenter"
}


The recipient information - userNameemailrecipientId, and clientUserId - must match the values that were provided when the recipient was first added to the envelope, otherwise an error will be returned. Also note we use the userNameproperty to reference the recipient's name instead of just name.
The authenticationMethod is an enumerated value that indicates the convention used to authenticate the signer. Since, with Embedding, you are telling Docusign that you are handling authentication this is your way of telling the platform how you authenticated the recipient. This information will also be included in the Certificate of Completion, a PDF that is automatically generated for every completed envelope. Lastly, the returnUrl is where the recipient will be re-directed to once signing is complete.
A successful response looks like:
{
"uri": "https://demo.docusign.net/Signing/startinsession.aspx?t=fd6b9e60-e6f6-4260-a9fc-1f4d2e1973d1&pei=d1cf4bea-1b78-47ea-b372-746678e3679f"
}

Sample Code:

packagecom.kishore.docusign;

/**
* Docusign integration
* Author: Kishore Polsani
*/

importjava.io.BufferedReader;
importjava.io.InputStreamReader;
importjava.io.Serializable;
importjava.util.Dictionary;

importjavax.servlet.ServletException;

importorg.apache.commons.lang.StringUtils;
importorg.apache.felix.scr.annotations.Activate;
importorg.apache.felix.scr.annotations.Component;
importorg.apache.felix.scr.annotations.Properties;
importorg.apache.felix.scr.annotations.Property;
importorg.apache.felix.scr.annotations.Service;
importorg.apache.http.HttpEntity;
importorg.apache.http.HttpHost;
importorg.apache.http.HttpResponse;
importorg.apache.http.client.HttpClient;
importorg.apache.http.client.methods.HttpGet;
importorg.apache.http.client.methods.HttpPost;
importorg.apache.http.conn.params.ConnRoutePNames;
importorg.apache.http.entity.ByteArrayEntity;
importorg.apache.http.impl.client.DefaultHttpClient;
importorg.apache.sling.api.SlingHttpServletRequest;
importorg.apache.sling.api.SlingHttpServletResponse;
importorg.apache.sling.api.servlets.SlingAllMethodsServlet;
importorg.apache.sling.commons.json.JSONArray;
importorg.apache.sling.commons.json.JSONException;
importorg.apache.sling.commons.json.JSONObject;
importorg.osgi.service.component.ComponentContext;
importorg.slf4j.Logger;
importorg.slf4j.LoggerFactory;

@Component(name ="com.kishore.docusign.DocusignViewRecipientLink", label ="AEM Docusign - Integration", immediate =true, metatype =true)
@Service
@Properties({ @Property(name ="service.description", value ="AEM Docusign - Integration"),
@Property(name ="service.vendor", value ="AEM Quickstart"),
@Property(name ="docuservicebaseurl", value ="https://demo.docusign.net"),
@Property(name ="docusignLoginUrl", value ="https://demo.docusign.net/restapi/v2/login_information"),
@Property(name ="docuusername", value ="XXXX@XXXX"),
@Property(name ="docupassword", value ="XXXXX"),
@Property(name ="sling.servlet.paths", value ="/services/docusign/DocusignViewRecipientLink", propertyPrivate =true),
@Property(name ="sling.servlet.methods", value ="POST"),
@Property(name ="proxyurl", value ="xxxxxxxxxx"),
@Property(name ="proxyport", value ="80"),
@Property(name ="integratorkey", value ="XXXXX-XXXXX-XXXXX-XXXXX-XXXX") })

publicclassDocusignViewRecipientLinkextendsSlingAllMethodsServletimplementsSerializable{
/** The log. */
privateLogger log =LoggerFactory.getLogger(DocusignViewRecipientLink.class);

privatestaticfinallong serialVersionUID =1L;

privateString loginServiceUrl;
privateString serviceBaseUrl;
privateString userName;
privateString password;
privateString integratorkey;
privateString proxyurl;
privateString proxyport;
privateString accountid;

protectedvoiddoGet(SlingHttpServletRequestrequest,
SlingHttpServletResponseresponse) throwsServletException
{
doPost(request, response);
}

publicvoiddoPost(SlingHttpServletRequestrequest, SlingHttpServletResponseresponse) throwsServletException {
log.info("loginServiceUrl :"+ loginServiceUrl);
log.info("userName"+ userName);
log.info("password "+ password);
log.info("integratorkey:"+ integratorkey);
log.info("serviceBaseUrl: "+serviceBaseUrl);
JSONObject obj =newJSONObject();
String recipientLink=null;
try {
obj.put("Username", userName);
obj.put("Password", password);
obj.put("IntegratorKey", integratorkey);
HttpClient httpClient =newDefaultHttpClient();
HttpGet getRequest =newHttpGet(loginServiceUrl);
//If proxy is required, else avoid the below two lines
HttpHost proxy =newHttpHost(proxyurl, Integer.parseInt(proxyport));
httpClient.getParams().setParameter(ConnRoutePNames.DEFAULT_PROXY, proxy);

getRequest.addHeader("X-DocuSign-Authentication", obj.toString());
HttpResponse responseHttp = httpClient.execute(getRequest);
BufferedReader rd =newBufferedReader(newInputStreamReader(responseHttp.getEntity().getContent()));
StringBuffer result =newStringBuffer();
String line ="";
int status = responseHttp.getStatusLine().getStatusCode();
log.info("Base Url Status :"+result);
JSONObject resJsonObj =newJSONObject();
if (status ==200) {
while ((line = rd.readLine()) !=null) {
result.append(line);
}
log.info("result :"+result);
if (!StringUtils.isEmpty(result.toString())) {
JSONObject resObj =newJSONObject(result.toString());
JSONArray quote = resObj.getJSONArray("loginAccounts");
String baseUrl = (String)quote.getJSONObject(0).get("baseUrl");
log.info("baseUrl :"+baseUrl);
String accountId = (String)quote.getJSONObject(0).get("accountId");
log.info("Account Id :"+accountId);
String envIdParam = request.getParameter("envelopeId");
log.info("userNameParam :"+envIdParam);
StringBuffer sb =newStringBuffer();
sb.append(serviceBaseUrl+"/restapi/v2/accounts/"+accountId+"");
sb.append("/envelopes/"+envIdParam+"");
sb.append("/views/recipient");
log.info("Envelope Url :"+sb.toString());
httpClient =newDefaultHttpClient();
HttpPost postReq =newHttpPost(sb.toString());
httpClient.getParams().setParameter(ConnRoutePNames.DEFAULT_PROXY, proxy);
postReq.addHeader("X-DocuSign-Authentication", obj.toString());
postReq.addHeader("Content-Type", "application/json");
postReq.addHeader("Accept", "application/json");
String userNameParam = request.getParameter("userName");
String emailParam = request.getParameter("email");
String clientUserIdParam = request.getParameter("clientUserId");
String docuSignReturnUrl = request.getParameter("docuSignReturnUrl");
log.info("userNameParam :"+userNameParam);
log.info("emailParam :"+emailParam);
log.info("clientUserIdParam :"+clientUserIdParam);
log.info("docuSignReturnUrl :"+docuSignReturnUrl);
JSONObject envJson =newJSONObject();
envJson.put("userName", userNameParam);
envJson.put("email", emailParam);
envJson.put("recipientId", 1);
envJson.put("routingOrder", 1);
envJson.put("clientUserId", clientUserIdParam);
envJson.put("authenticationMethod", "email");
envJson.put("returnUrl", docuSignReturnUrl);
HttpEntity entity =newByteArrayEntity(envJson.toString().getBytes("UTF-8"));
postReq.setEntity(entity);
HttpResponse envResponse = httpClient.execute(postReq);
log.info("Response Code"+ envResponse.getStatusLine().getStatusCode());
int envStatus = envResponse.getStatusLine().getStatusCode();
log.info("Status :"+envStatus);

if(envStatus >=200&& envStatus <300) {
rd =newBufferedReader(newInputStreamReader(envResponse.getEntity().getContent()));
StringBuffer result1 =newStringBuffer();
String line1 ="";
while ((line1 = rd.readLine()) !=null) {
result1.append(line1);
}
JSONObject finalJsonObj =newJSONObject(result1.toString());
recipientLink = (String) finalJsonObj.get("url");
if(!StringUtils.isEmpty(recipientLink)) {
resJsonObj.put("url", recipientLink);
log.info("recipientLink: "+recipientLink);
}

}
else{
thrownewException("Docusing status is "+envStatus);
}
}
} else {
resJsonObj.put("status", String.valueOf(status));
}
response.setContentType("text/html");
response.getWriter().write(recipientLink);

} catch (JSONException e) {
log.error("Json Exception details :"+ e.toString());
} catch (Exception e) {
log.error("Exception details :"+ e.toString());
}
log.info("doPost Ended");

}

/**
* default activate method.
*
* @param context
* the context
* @throws Exception
* the exception
*/

@Activate
protectedvoidactivate(ComponentContextcontext) throwsException {
@SuppressWarnings("rawtypes")
Dictionary properties = context.getProperties();
loginServiceUrl = (String) properties.get("docusignLoginUrl");
serviceBaseUrl = (String) properties.get("docuservicebaseurl");
userName = (String) properties.get("docuusername");
password = (String) properties.get("docupassword");
integratorkey = (String) properties.get("integratorkey");
proxyurl = (String) properties.get("proxyurl");
proxyport = (String) properties.get("proxyport");
}
}

Sample Ajax Call

var signerName ="Kishore Polsani";
var signerEmail="kishore.polsani@gmail.com";
var envelopeId ="xxxxxxxxxxxxxxxxxxxxxxxx";
var clientUserId ="xxxxxxxxx";
var docuSignReturnUrl ="https://localhost:5433/content/kishore/docusign.html";
$.ajax({
type:"GET",
async: true,
url:"/services/salesforce/docusignViewRecipientLink ",
data: {
userName:signerName,
email :signerEmail,
envelopeId :envelopeId,
clientUserId:clientUserId,
docuSignReturnUrl:docuSignReturnUrl
},
success: function(result) {
console.log("result"+result);
window.location.href = result;
},
error: function(result) {
console.log("Docusign Recipient Link"+result);
}
});
Test this API

AEM OSGI component is not visible

$
0
0
When new AEM project is created we may find OSGI components are not displayed in /system/console/components or in manifest.mf or in bundle.

To avoid this add the below plugin in the parent pom.xml and rebuild the project

<plugin>
<groupId>org.apache.felix</groupId>
<artifactId>maven-bundle-plugin</artifactId>
<version>2.3.7</version>
<configuration>
<instructions>
<Embed-Dependency>*;scope=compile|runtime</Embed-Dependency>
<Embed-Directory>OSGI-INF/lib</Embed-Directory>
<Embed-Transitive>true</Embed-Transitive>
</instructions>
</configuration>
</plugin>

AEM 6.3 - Things to know

$
0
0
Adobe expanded the capabilities of Adobe Experience Manager with the announcement of the new Adobe Experience Cloud at Adobe Summit in March 2017. Adobe Experience Manager’s latest release became generally available on the 26th of April 2017.


Online Revision Cleanup Support

This new release ships with a brand new Tar file format: Oak Segment Tar. It claims to perform better than the previous TarMK format and also fully supports online revision cleanups. This last point should be music to the ears of anyone who has worked on cloud automation with AEM. There will no longer be a need to shutdown an instance to perform a repository compaction and it is now scheduled to run frequently as part of the maintenance tasks.

It’s worth noting that AEM 6.3 does not support the previous TarMK format, which means a repository migration is necessary. Thankfully, Adobe claims to have made the upgrade process more resilient.

Livefyre Integration

Adobe acquired Livefyre back in May 2016 and has now integrated it within Adobe Experience Manager as a set of components along with a user-generated content ingestion & moderation console. Once a Livefyre cloud service configuration is setup, it allows content authors to add components (located under “/libs/social/integrations/livefyre/components“) on a page to surface user generated content from social media like Twitter and Instagram. The combination of traditional branded experiences and social media content will prove to be an effective way to drive engagement with customers. The use of Livefyre does require a separate Assets and Livefyre license but doesn’t require a Communities license.

Authoring Improvements

There have been a few minor improvements to the Page Editor like the addition of the component title  (the “jcr:title” property) on the bottom right hand side of a component when hovering and clicking on it. It’s a small change but makes it really easy to identify the component being used.
component-title
Another improvement that also makes it easier to identify components on a large page is the new Content Tree available from the side rail in Edit mode.

Content Fragments: Summarise & Sync

The Content Fragments introduced in AEM 6.2 got some love in this release too with the introduction of the “Summarise text” and “Sync with master” features. The Summarise feature uses NLP to read through the sentences of an existing fragment variation and identifies the sentences that can be removed. A very handy comparison tool is presented to users once the analysis is complete allowing content authors to select/de-select sentences to remove.
fragment-summarize
The second feature is a Sync that allows fragment variations to be sync’d with the master variation in case changes have been made to it. It’s worth pointing out that this is a one-way sync, which means variations can only sync with master and not the other way around. This sync also needs to be performed manually for each variation. Before the sync is completed users are presented with a comparison but unlike the Summarise comparison, no changes can be made in this instance.
fragment-sync
These improvements to manage reusable content will incentivize companies to think of content as independent of the delivery channel and push the idea of content as a service even more. That brings us to the next improvement…

Sling Model Exporter

Traditionally, Sling models were used to provide an abstraction of a resource or request, providing HTL scripts with the required data to produce HTML. Since Sling Models version 1.3.0, an Exporter framework is included which allows models to be serialised to JSON format (powered by Jackson) and automatically registered against a resource type. The Jackson Exporter is quite configurable (i.e. MapperFeatureSerializationFeature); However it merely goes through the model’s getters to build a JSON rendition.
To attach the exporter framework to a Sling model, define a resourceType using the @Model annotation and use the @Exporter annotation to specify the Jackson exporter along with the Sling extension (and optionally the selectors). It’s also possible to make use of Jackson annotations to alter the JSON representation of the model.
@Model(
adaptables =Resource.class,
resourceType ="acme/components/sling-model"
)
@Exporter(name ="jackson", extensions ="json")
publicclassMyModel {

@Inject@Named("jcr:title")
privateString title;

@Inject@Named("jcr:created")
privateCalendar createdAt;

publicStringgetTitle() {
return title;
}

@JsonIgnore
publicCalendargetCreatedAt() {
return createdAt;
}
}

If the Exporter framework is to become the norm for driving content as a service, I wonder what the future holds for the Siren+JSON API that was introduced in AEM 6.1. It was my understanding this API was created specifically for delivering content from AEM to third parties; However, it looks as though the Exporter framework is more flexible by providing developers with full control of what/how content is delivered.

Projects, workflows and inbox (and collaboration)

  • NEW Master Project – Project team roles and permissions can be assigned to the master project and reused across multiple projects.
  • NEW Calendar View– Projects and tasks shown in a calendar view for better project management and scheduling.
  • Enhanced inbox user interface for greater collaboration and visibility into user’s tasks and workflow.

Sites

  • NEW Experience Fragments – A set of content that can be reused across channels (owned channels and third-party touch points).
  • Enhanced Content Fragments – Enhancements include import plain text file, insert asset, summarize text with target number, rename/delete content fragment variations, add fragment to collection, asset card display, download content fragment, enhance the use of assets in content fragment.
  • Enhanced Touch UI – Sites editor, NEW Live Copy Overview, Blueprint Configuration Manager, Timewarp.
  • Enhanced Sites Template Editor – Consistent author experience with Sites, advanced policy configurations made available with Editable Templates.
  • Manage Publication from AEM Sites – Console for management of bulk un/publication.
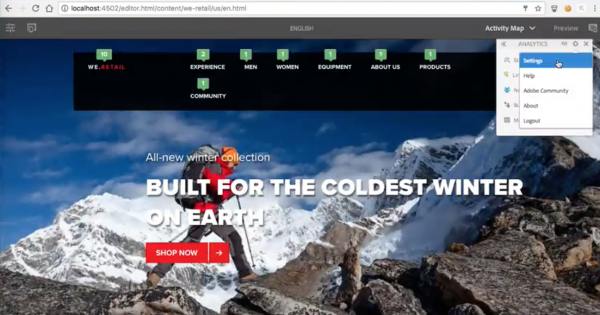
  • NEW AEM Sites Activity Map integration – Display Adobe Analytics data directly on the AEM Sites page with different settings.
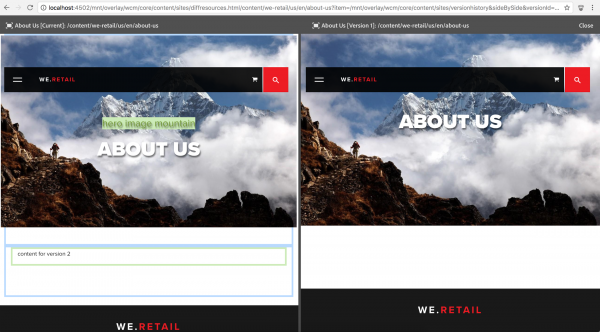
  • NEW side-by-side preview of page difference for Touch UI – Compare page versions, compare launch pages.

Assets

  • Enhanced Assets Search – New Search Boost to add keywords to the asset, multi-value search predicate, tag predicate.
  • New side-by-side comparison of images in Assets’ Review Task.
  • NEW Check-in/Check-out – Let a user make changes to an asset while preventing other users from modifying the asset.
  • Enhanced AEM Desktop App – Sync Status console.
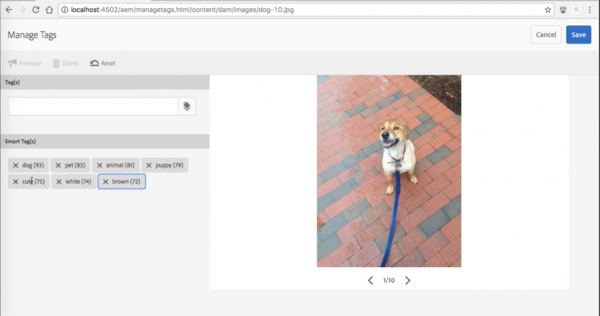
  • Smart Tags and Manage Tags console are available.
  • New create interactive videos – Allows user to create segments for the video asset and associate call-to-actions.
  • Enhanced Asset Annotation – Use different colors, print, generate PDF output.
  • New AEM Asset Template – Allows marketers to create brochures or other marketing materials easier when integrated with InDesign server.
  • Dynamic Media features available:- Color management, custom video thumbnails, non flash video player (using HLS technology, Apple’s HTTP Live Streaming video delivery protocol), Dynamic Media Viewer enhancements.

Forms

  • New User Profile Integration – Automatically pre-fill adaptive form with user data.
  • Integrate with JDBC database and create form data model.
  • Enhanced Adobe Sign integration – Support anonymous and multi-user sign use-cases.
  • Enhanced Correspondence Management capabilities.

Platform

New Online Revision Clean Up – An addition to offline revision clean up with minimal impact to AEM performance, allowing you to keep a clean performant AEM instance.

Communities

  • NEW Featured Content – Allow community members to highlight content for blogs, forums, etc.
  • NEW Ideation Feature – Allow community members to create, view, follow, vote for ideas.
  • Prevent Spam and Flooding – Using contribution limits feature.
  • Enhanced Badge Management.
  • NEW Database Storage Resource Provider (DSRP) – Use a relational database to store user generated content (UGC).
  • Dispatcher Caching for Guest Visitors – Allow dispatcher to serve fully cached versions of a community site’s pages.
  • Edit Community Groups from Author.
  • Use Livefyre components to embed UGC in experience.

Mobile

  • NEW AEM Mobile Content Services – Easier to request content that’s managed by AEM, without deep knowledge of AEM’s content repository (JCR) and web framework (Sling).
  • Model Management – Create and manage models, which describes the type of content and denotes what information will be available to the native application, entities, and spaces.
There truly are a lot of new and enhanced features that will come with Adobe Experience Manager (AEM) 6.3. With Internet of Things (IoT) devices become more and more popular, enterprises are looking to streamline digital experience across more than smartphones, tablets and desktops. CMS will need to not only support more types of content, but also deliver a fluid experience across different channels and devices easily. I am happy to see AEM 6.3 continues to empower the creation and management of digital experiences, backed by cutting-edge technology. AEM’s user-friendly interface also gives you access to data insights and business intelligence – ultimately providing an integrative system for markers to manage content.

LiveCopies Overview

I was excited to hear that with AEM 6.3, the Blueprint Control Centre was being replaced by a brand new Touch UI based LiveCopies Overview console. Unfortunately, I found the new console to be quite difficult to use and makes it harder to find out the status of a LiveCopy. The old Blueprint Control Centre used a tree view on the left hand side that I think is a lot more intuitive and also didn’t require a full page reload to drill down into child pages.
Here’s a side by side comparison – you be the judge:

Javascript Minification

With AEM 6.3, a lot of libraries got an update: the underlying Jetty servlet engine, Sling, Oak, etc. However, AEM 6.3 is still making use of the YUI compressor by default – a project that is no longer under active development (latest release was in May 2013). The more recent Google Closure compiler is in fact bundled with AEM but will only compress client libraries that contain the jsProcessor[]=min:gcc property.

Sass Support (or lack thereof)

Adobe seems reluctant to add support for the Sass CSS pre-processor despite the front-end community favouring Sass (if Google trends for those keywords is anything to go by). What bewilders me is it’s a feature that is so easy to develop and I feel would benefit a lot of development teams working with Sass-based style guides. Shameless plug: I developed a Sass compiler for AEM that adds native support for compilation of “.scss” files.

Admin Password Prompt

On initial start up of the 6.3 Quickstart, users are prompted to set the default admin password to avoid running AEM with the default admin password. This is great for hardening the platform but can be annoying when working with automation suites. The good news is it’s possible to prevent this prompt from appearing by using the nointeractive flag like so:
java -jar aem-6.3-author-p4502.jar -nointeractive
The instance will startup normally with the default “admin” password.

Create AEM porject structure using Lazybones

$
0
0
Lazybones is a command line tool to create AEM project structure. Adobe is recommending its customers to create AEM project structure using Lazybones instead of traditional Maven archetype 10. As when we create a aem project using Maven archetype it is not easy to customize, it provides lots of sample content and packages like test, launcher. Which might not be required for your project, on contrary lazybones bones is very interactive , flexible and easy to customize according to your project need. Adobe consulting Services (ACS) provides a aem multi module template using which you can create AEM projects, which includes lot of default config options and also provides an option to include the ACS commons package as a sub package.
The aim of this tutorial is to learn what is lazybones and how we can use it to create an aem skeleton project structure, as Adobe consulting Services (ACS) has updated the template version and provided the support for AEM 6.3 also i am going to create project structure for AEM 6.3, for learning i am using windows machine so we are going to install lazybones on windows, but you can install it on linux and other operating systems also.
Lazybones Overview:- Lazybones is a command line tool and is build in two parts. First lazybones command line tool and second project templates. This command line tool allows you to create a new project structure for any framework or library for which the tool has a template. Currently ACS has contributed one template for creating AEM multi module project, which we are going to use in this tutorial. You can also contribute templates by sending pull requests to this GitHub project or publishing the packages to the relevant Bintray repository.


Install Lazybones

In order to install Lazybones for creating project skeleton in aem follow below steps:-

  • Extract the zip file and set the environment path variable to \lazybones-0.8.3\bin Open command prompt and type lazybones. 
  • If lazybones is successfully installed then you will see list of available commands as shown below.
Note:- If you get error like lazybones is not a command, then check environment path is configured correctly or download the package again as it might be corrupted.

Create project structure using Lazybones

Command to create new project

lazybones create <template name><template version><target directory>


Note:- Here template version is optional and if you leave it out, Lazybones will install the latest version of the template it can find.

Steps to create project using Lazybones:
  • Open command prompt.
  • Run below command

lazybones create aem-multimodule-project 1.0D:/CQ5/Projects/lazybones-0.8.3/project

Here template name is aem-multimodule-project, if we use any custom template then it will show below error.
If version entered is wrong, then we will get below error.

Press enter after entering the create command. Enter required info.


Note:- Here create is the lazybone command, aem-multimodule-project is acs common template name for creating the project and aemtraining is the folder/directory name where i want to create my project. If target folder is not available then it creates this folder.


Build and Install Project

Run below command to install the lazybones project in aem
mvn clean install


Sling validation in AEM

$
0
0

Content validation for AEM

What if we had a validation mechanism in AEM that validates our resources on demand? We could define our own validation rules and notify content editors when validation fails. Validation rules could be simple (e.g. checking mandatory fields) or complex (e.g. validating a number and type of components inside a container component). In addition, we could validate an AEM page just before it gets published. Once again just to be 110% sure! Sounds great! Is this even possible in AEM?

How to implement sling validation in AEM

We can achieve all of this using Sling Validation and a little magic. The validation project started with SLING-2803 in 2013 and the current implementation can be found at Apache Sling repository. Open-source software community is still working towards release 1.0 and there might be API changes in the future. Therefore, AEM 6.1 is not shipped with Sling Validation yet, but you can easily add it to your project.
Let's dive in by exploring how we can employ Sling Validation to validate a number of components inside a container component. The out of the box AEM paragraph system does not restrict the number of components editors can drag&drop inside the paragraph system. We can write our validation rules as follows: container component cannot have less than 2 and more than 6 components. Now we will put these validation rules inside the Validation Model

Validation model

Here is a real life example. Let's validate the Layout Container component that comes with AEM 6.1. This standard component is a paragraph system that contains other components and its resource can be found at "/libs/wcm/foundation/components/responsivegrid". The resource is bound to a Validation Model by constructing a data structure:  
  • Jump to CRXDE Lite and create a new folder somewhere close to your components, e.g. /apps/geometrixx-media/components/validation.
  • Now create a new node "validation.model.responsivegrid” and add two mandatory properties: "sling:resourceType" and "validatedResourceType".
  • A value of "sling:resourceType" must be "sling/validation/model" otherwise Sling Validation will not find it! A property "validatedResourceType" binds your validation model with a resource for which validation will be applied.       
  • Now specify the resource property to validate and the validator to use by creating the following structure:
Here, we validate property "sling:resourceType" of resource "wcm/foundation/components/responsivegrid" using java validator class "com.example.validators.MinMaxValidator".
  • We can make property "sling:resourceType" mandatory by adding property "optional" with value "false".
  • Finally, add property “validatorArguments” in order to provide arguments to our validator, e.g. container component can have only 2 to 6 child components.
That's it, we have created the following data structure for our Validation Model:
<?xml version="1.0" encoding="UTF-8"?>
<jcr:root xmlns:sling="http://sling.apache.org/jcr/sling/1.0"
xmlns:jcr="http://www.jcp.org/jcr/1.0"
jcr:primaryType="nt:unstructured"
sling:resourceType="sling/validation/model"
validatedResourceType="wcm/foundation/components/responsivegrid">

<properties jcr:primaryType="nt:unstructured">
<sling:resourceType jcr:primaryType="nt:unstructured" optional="{Boolean}false">
<validators jcr:primaryType="nt:unstructured">
<com.example.validators.MinMaxValidator jcr:primaryType="nt:unstructured"
validatorArguments="[minNumberAllowed=2,maxNumberRequired=6]"/>

</validators>
</sling:resourceType>
</properties>
</jcr:root>
It’s time to have some coding fun and write our validation logic.

Validator

The validation is going to live inside your validator class that implements Validator interface:
packagecom.example.validators;
import...;

@Component
@Service(value =Validator.class)
publicclassMinMaxValidatorimplementsValidator<String> {
publicstaticfinalStringMAX_NUMBER_ARGUMENT="maxNumberRequired";
publicstaticfinalStringMIN_NUMBER_ARGUMENT="minNumberAllowed";

@Override
publicStringvalidate(finalStringdata, finalValueMapproperties, finalResourcecontainerResource, finalValueMapvalidationArguments)
throwsSlingValidationException {
finalInteger maxAllowedComponents = validationArguments.get(MAX_NUMBER_ARGUMENT, Integer.class);
finalInteger minRequiredComponents = validationArguments.get(MIN_NUMBER_ARGUMENT, Integer.class);

if (maxAllowedComponents ==null|| minRequiredComponents ==null) {
thrownewSlingValidationException("Mandatory arguments are missing!");
}

finalint numberOfChildComponents =Iterables.size(containerResource.getChildren());

if (numberOfChildComponents < minRequiredComponents) {
returnString.format("Minimum %s component(s) required!", minRequiredComponents);
}
if (numberOfChildComponents > maxAllowedComponents) {
returnString.format("Maximum %s component(s) allowed!", maxAllowedComponents);
}

// validation passed successfully
returnnull;
}
}
Notice how we get the validation arguments and the resource being validated: We return a formatted error message if the number of child components exceeds the limits.
Now it's time to decide when we are going to trigger validation.

Validation service

First option. The ValidationService OSGi service provides convenient methods to retrieve correct ValidationModel and validate chosen resource with that model:
@Reference
private ValidationService validationService;
...
ValidationModel validationModel = validationService.getValidationModel(containerResource, true);
ValidationResult validationResult = validationService.validate(containerResource, validationModel);
...
Second option. Sling Models will find the right Validation Model and will trigger validation on the resource for you. All you have to do is to use attribute "validation" on the Model annotation. Currently Sling Models is able to throw validation exceptions only if the model is instantiated with the ModelFactory. It's opposite to Sling Adapter framework that swallows validation exceptions because the adaptTo() method is supposed to return null and never throw an exception.

Validate page in workflow

Once all validation models are in place, it's relatively easy to validate pages during publishing/activation process. To implement such automatic validation, an activation workflow could include a custom workflow step where the Validation Service can be injected. The service has a convenient method validateResourceRecursively that validates all child resources recursively having their own Validation Model configured. All we have to do is to pass a page content resource: 
@Reference
private ValidationService validationService;
..
// Validate page resource and all child resources recursively using Sling Validation
ValidationResult result = validationService.validateResourceRecursively(page.getContentResource(), false, null, true);

Validation errors

Now we know how to trigger validation, but how do we handle validation failures? Depending on the validation outcome, the whole component can be either rendered or not. Sling Validation does not provide functionality to set a severity level of the validation message. There is no way to distinguish between validation errors, which make rendering of the component impossible (e.g. missing required field), and validation warnings, which try to render the component (e.g. too many characters). Despite this limitation, we can still nicely notify our editors that there was a validation error by implementing a custom Sling Component Filter. This filter handles validation exceptions and appends a small HTML snippet that adds a tooltip like qtip2.com to the component: 

Advantages of sling validation

A newly introduced Sling Validation can make your application more robust with less boilerplate code. In addition, it opens endless possibilities for content validation. Writing validators for a number, type or order validation is straightforward. Unfortunately, there is no connection towards Classic UI/Touch UI form validation and therefore those validation rules have to be implemented separately. It's worth reminding that Sling Validation is still in development and your contribution is more than welcome!

Debugging Adobe Dynamic Tag Management (DTM)

$
0
0
Adobe Analytics is a powerful tool to analyse almost anything that can be tracked on a website. Unfortunately, any additional, customised code and feature increases the risk of introducing bugs as well.

Setting up the debugging environment

We already briefly discussed the advantages of DTM and how to include it into a digital marketing platform in a prior article on our blog. Once DTM is set up and all the necessary rules that help tracking the right data are defined, the fun begins: Seeing them in action. When testing if everything works the way it should two things need to be considered:
  1. The rule is firing successfully
  2. The variables are mapped correctly
In order to properly manage to monitor this you need a packet analyser (or network analyser). Don't get intimidated though, you have one installed already, and you love to watch youtube with it.
Yes, your browser most surely has a packet analyser already built in. It's normally the "network" tab of the “web console” or “developer tools” of your preferred browser. The name changes from one browser to another, but you should be able to find it in the browser's options. Also, there are some add-ons and plug-ins that can also do the same thing.
For simplicity I'll stick with Google Chrome's console (which you can bring up by hitting F12 on a PC, or ⌥⌘j on a Mac), and the Adobe Marketing Cloud Debugger plugin. Follow the instructions on Adobe's website to set everything up correctly.

Enough with the tools, let's start debugging

To make things a bit more visual lets think of an example: you set a “Page Load Rule” with a condition to fire for all pages that contain the word “marketing” in the URL. Now, you load the specific page, and want to know if your rule fired or not. You have a couple of ways of knowing this:
First approach to see if a rule fired:
Set at least one variable in the “Adobe Analytics” section of the DTM rule; for example the Page Name. Now go to the Chrome's console, and in the “network” tab, look for a request to the Adobe Analytics servers. Pro tip: all request to Adobe Analytics have “/ss/” in the URL, so you can filter these out with the search function. 

Setting the Page Name Variable in DTM
Filtering out Adobe Analytics requests in Google Developer Tools

The image above shows that the rule fired successfully. Now, you can click on the result, see the contents of it, and confirm that the pageName came through as you set it.
For better usability you can use the "Adobe Marketing Cloud Debugger". It shows the content of the requests in a better and easier to read way. This is how our request looks like on the debugger tool:

Using the Adobe Marketing Debugger Tool to see if a rule is fired

By looking at the request on the debugger, you can easily confirm that your variables are mapped correctly, too. In this case we are only setting page name, but of course here you can also check your evars, props, events and other system or configuration variables.
If you want to use DTM for any tool other than Adobe Analytics, you can still check if the rule fired successfully using the method we described above. But to control if the variables were mapped correctly and a more in depth analysis you should get some advice on how to debug that specific tool that you are using.
The quick check to see if a rule is fired:
Another very simple hack to see if a rule is fired or not is using Javascript. You can add a short script to your DTM rule that will inform you once a rule is fired. Simply go to the “Javascript / Third Party Tags” section of the DTM rule and add a very simple new script: console.log(“Marketing Page Rule Fired”);

Adding JavaScript to a DTM rule
Adding the right script to display notifications in the browser console

“Console logs” are vastly used for debugging code. All they do is to display anything you want in your browser console. In this case we only want it to display the text “Marketing Page Rule Fired” as soon as the rule is triggered. If the rule fires, you will see something like below on your console:

Seeing the page rule fired in the browser's console

 Making Adobe DTM work
Now you know how to debug your rules and confirm that your variables are mapped correctly. As mentioned above, the same thing can be achieved with several other tools, like the Firefox's console, firebug + omnibug, Httpfox, or other browsers' consoles.
Do you use any other debugging methods? Let us know in the comments!

AEM - Salesforce lightning component - Access-Control-Allow-Origin

$
0
0
When I try to access salesforce lightning components in AEM, I was not able to access the lightning script from AEM server, I got below error in browser console.

Issue:

XMLHttpRequest cannot load https://AAAAAA.lightning.force.com/lightning/lightning.out.js. 
Response to preflight request doesn't pass access control check: No 'Access-Control-Allow-Origin' 
header is present on the requested resource. Origin 'https://localhost:5544' is therefore not allowed access.

Solution:

We need to whitelist the origin i.e. our aem server in salesforce. 
  • Goto salesforce.com site, click on Setup -> search for CORS
  • Goto CORS console, give the AEM server url pattern, in my case it is https://localhost:5544


Creating an AEM System User for AEM 6.1

$
0
0
In AEM 6.1, you must create an AEM System User to successfully get a session using code such as:

Map<String, Object> param = new HashMap<String, Object>();
param.put(ResourceResolverFactory.SUBSERVICE, "datawrite");
ResourceResolver resolver = null;

try {
           
    //Invoke the adaptTo method to create a Session used to create a QueryManager
 resolver = resolverFactory.getServiceResourceResolver(param);
    session = resolver.adaptTo(Session.class);

Note - see this article:

Querying Adobe Experience Manager 6 data using the Sling getServiceResourceResolver method

This code will not work in AEM 6.1 using a standard user, 
Note: All AEM 6.x HelpX  Articles will be updated soon to use a System user to obtain a Session object from within an OSGi bundle.

To create a system user, perform these tasks:


  1. Open http://localhost:4502/crx/explorer/index.jsp
  2. Login as admin
  3. Click User Administration
  4. Click Create System User
  5. Set the UserId
  6. Click Save
Once created, you can extend permissions like a normal user using the AEM ACL functionality. 

Creating new system user:

Configure the service name "datawrite" in OSGI, go to Apache Sling Service User Mapper Service and enter BundleID:service-name=system-user-name.
Example: com.kishore.core:datawrite=sysuser


Sling Models in AEM

$
0
0
We used to develop back-end login to components either by using WCMUse or WCMUsePojo or even JSP. With the release of AEM 6.3 and AEM Core WCM Components, we see that using Sling Models have been advocated by Adobe as the best practice. Now let’s take a look how we can use Sling Models.


You can work with Sling Models when developing with Adobe Experience Manager (AEM). That is, when developing an AEM project, you can define a model object (a Java object) and map that object to Sling resources. For more information, see Sling Models.
A Sling Model is implemented as an OSGi bundle. A Java class located in the OSGi bundle is annotated with @Model and the adaptable class (for example, @Model(adaptables = Resource.class). The data members (Fields) use @Inject annotations. These data members map to node properties.


Create UserDetails.java POJO class
package com.kishore.core.sling.model;

/*
* Author: Kishore Polsani
* Date: 02-JUN-2017
*/

import javax.inject.Inject;

import org.apache.sling.api.resource.Resource;
import org.apache.sling.models.annotations.Model;

@Model(adaptables = Resource.class)
publicclassUserDetails {
@Inject
privateString firstName;

@Inject
privateString lastName;

publicString getFirstName(){
return firstName;
}
publicString getLastName(){
return lastName;
}
}

SlingModel class


Add a Java file to the com.kishore.core.sling.model package named SlingModels. The Java class that you create in this section extends the Java class named org.apache.sling.api.servlets.SlingAllMethodsServlet. This class is required to define an AEM Sling Servlet. For information, see Class SlingAllMethodsServlet.
The SlingModels class uses the following Sling Servlet annotation:
@SlingServlet(paths="/services/kishore/slingModel", methods="GET") 
Notice that this servlet is defined as a GET. Later in this development article, an AJAX GET operation is used to invoke this operation. 
package com.kishore.core.sling.model;

import java.io.IOException;
import java.util.HashMap;
import java.util.Map;

import javax.servlet.ServletException;

import org.apache.felix.scr.annotations.Reference;
import org.apache.felix.scr.annotations.sling.SlingServlet;
import org.apache.sling.api.SlingHttpServletRequest;
import org.apache.sling.api.SlingHttpServletResponse;
import org.apache.sling.api.resource.LoginException;
import org.apache.sling.api.resource.Resource;
import org.apache.sling.api.resource.ResourceResolver;
import org.apache.sling.api.resource.ResourceResolverFactory;
import org.apache.sling.api.resource.ValueMap;
import org.apache.sling.api.servlets.SlingAllMethodsServlet;
import org.slf4j.Logger;
import org.slf4j.LoggerFactory;

@SlingServlet(paths="/services/kishore/slingModel",methods="GET")
publicclassSlingModelsextendsSlingAllMethodsServlet{
privatestatic final long serialVersionUID =1L;
Logger logger = LoggerFactory.getLogger(SlingModels.class);
@Reference
ResourceResolverFactory resourceResolverFactory;

publicvoid doGet(SlingHttpServletRequest request, SlingHttpServletResponse response) throws ServletException, IOException{
logger.info("inside sling model test servlet");
response.setContentType("text/html");
Map<String, Object> param =new HashMap<String, Object>();
param.put(ResourceResolverFactory.SUBSERVICE,"datawrite");
ResourceResolver resolver =null;

try {
//resourceResolver = resourceResolverFactory.getAdministrativeResourceResolver(null);
resolver = resourceResolverFactory.getServiceResourceResolver(param);

Resource resource = resolver.getResource("/content/testsling/slingmodel");

ValueMap valueMap=resource.adaptTo(ValueMap.class);

response.getWriter().write("Output from ValueMap is First Name: "+valueMap.get("firstName").toString()+" Last Name: "+valueMap.get("lastName").toString());
com.kishore.core.sling.model.UserDetails userObj= resource.adaptTo(com.kishore.core.sling.model.UserDetails.class);
response.getWriter().write("\n Output from ValueMap is First Name: "+userObj.getFirstName()+" Last Name: "+userObj.getLastName());

logger.info("First Name: "+userObj.getFirstName());
logger.info("Last Name: "+userObj.getLastName());
} catch (LoginException e) {
e.printStackTrace();
}

}

}

In the previous code example, notice that a Resource instance is created by referencing an AEM node:
Resource resource = resourceResolver.getResource("/content/testsling/slingmodel");
Then the Resource object's adaptTo method is used to create an com.kishore.core.sling.model.UserDetails object:
com.kishore.core.sling.model.UserDetails userObj= resource.adaptTo(com.kishore.core.sling.model.UserDetails.class);
This is possible because Sling Model annotations are used in the UserDetails class. Finally this servlet returns the value of the UserInfo object. 
response.getWriter().write("Output from Sling Model is First Name: "+userObj.getFirstName()+" Last Name: "+userObj.getLastName());
Note:
The return value of this servlet is displayed within an AEM page. 
Add below code in bundle pom.xml
<configuration>
<instructions>
<Bundle-SymbolicName>com.kishore.com.kishore</Bundle-SymbolicName>

<Sling-Model-Packages>
com.lazybones.sling.models,
com.kishore.core.sling.model
</Sling-Model-Packages>

</instructions>
</configuration>

Add below dependencies in pom.xml
<dependency>
<groupId>org.apache.sling</groupId>
<artifactId>org.apache.sling.models.api</artifactId>
<version>1.0.0</version>
<scope>provided</scope>
</dependency>
<dependency>
<groupId>org.apache.sling</groupId>
<artifactId>org.apache.sling.api</artifactId>
<version>2.7.0</version>
<scope>provided</scope>
</dependency>


Create a component and add below code


<%@include file="/libs/foundation/global.jsp" %>
<html>

<head>
<meta charset="UTF-8">
<title>Kishore AEM Sling Model Page</title>
<style>
body {
background-color: lightgray
}
h1 {
color: red
}
p {
color: green
}
</style>
</style>
<script>
$(document).ready(function() {

$('body').hide().fadeIn(5000);

$('#submit').click(function() {
varfailure=function(err) {
alert("Unable to retrive data "+ err);
};


//Use JQuery AJAX to perform a GET to the AEM Sling Servlet that uses Sling Models
$.ajax({
type: 'GET',
url: '/services/kishore/slingModel',
success: function(msg) {
$('#json').val(msg);
}
});
});

}); // end ready
</script>
</head>


<body>


<

</div>

<form method="#">

<table border="1" align="left">


<tr>
<td></td>

<td>
<textarea id="json" rows="15" cols="50">
</textarea>
</td>

</tr>

<tr>
<td></td>
<td>
<input type="button" value="Get Sling Model Data" name="submit" id="submit">

</td>

</tr>

</table>

</form>
</body>

</html>

Adobe Analytics vs Google Analytics

$
0
0
Google Analytics and Adobe Analytics both are web analytics services used in the measurement, collection, analysis and reporting of web data for purposes of understanding and optimising web usage. However, Web analytics is not just a process for measuring web traffic, but can be used as a tool for business and market research, and to assess and improve the effectiveness of a website.


Useful Links


Remove duplicate user defined objects from an ArrayList

$
0
0
To remove duplicate user defined objects we need to override hashCode() and equals() methods and update the comparison logic accordingly.

I had a scenario where I had a list of objects, I need to remove duplicates from the list. I have overrided hashcode() and equals() method. When the duplicate object is encountered, the hashcode value will be same, then equals method is executed. If both objects are equal then it returns true and object will not be added to HashSet.

package com.kishore.samples;

import java.util.ArrayList;
import java.util.HashSet;

publicclassRemoveDuplicates {

publicstaticvoid main(String a[]) {

ArrayList<Price> listOfBlogs =new ArrayList<>();
listOfBlogs.add(new Price("aaa", 20));
listOfBlogs.add(new Price("22", 40));
listOfBlogs.add(new Price("333", 30));
listOfBlogs.add(new Price("aaa", 200));

HashSet<Price> set=new HashSet(listOfBlogs);
for (Price pr :set) {
System.out.println(pr);
}

}
}

classPrice {

privateString item;
privateint price;

public Price(String itm, int pr) {
this.item = itm;
this.price = pr;
}

publicint hashCode() {
System.out.println("In hashcode");
int hashcode =0;

hashcode = item.hashCode();
hashcode += item.hashCode();
System.out.println("hash code value for "+ item +" is "+ hashcode);
return hashcode;
}

public boolean equals(Object obj) {
System.out.println("In equals");
if (obj instanceof Price) {
Price pp = (Price) obj;
return (pp.item.equals(this.item));
} else {
returnfalse;
}
}

publicString getItem() {
return item;
}

publicvoid setItem(String item) {
this.item = item;
}

publicint getPrice() {
return price;
}

publicvoid setPrice(int price) {
this.price = price;
}

publicStringtoString() {
return"item: "+ item +" price: "+ price;
}
}

Output:

In hashcode
hash code value for aaa is192642
In hashcode
hash code value for22is3200
In hashcode
hash code value for333is101286
In hashcode
hash code value for aaa is192642
Inequals
item: aaa price: 20
item: 22 price: 40
item: 333 price: 30

Changing a .content.xml file locally is not reflecting in CRX after maven build

$
0
0
If .content.xml file is changed locally and changes are not reflecting in crx then check maven-resources-plugin.

Add below plugin in pom.xml of UI module.(aem-sample/aem-content-ui/pom.xml).

<plugin>
<groupId>org.apache.maven.plugins</groupId>
<artifactId>maven-resources-plugin</artifactId>
<executions>
<execution>
<id>copy-content-resources</id>
<phase>process-resources</phase>
<goals>
<goal>copy-resources</goal>
</goals>
<configuration>
<outputDirectory>${project.build.directory}/vault-work</outputDirectory>
<resources>
<resource>
<directory>${basedir}/src/main/content</directory>
<filtering>true</filtering>
<excludes>
<exclude>**/.svn</exclude>
<exclude>**/.vlt</exclude>
<exclude>**/.vltignore</exclude>
<exclude>**/.DS_Store</exclude>
<exclude>/etc/designs/${project.parent.artifactId}/jcr:content(/.*)?</exclude>
</excludes>
</resource>
</resources>
</configuration>
</execution>
</executions>
</plugin>

For maven-resources-plugin check that its copying your .content.xml to target folder and for content-package-maven-plugin check that correct filter values are set.
We can also verify by extracting the generated package and check if it has the changes or not or look at a vault-work directory in target and get to the directory in which you have changed the .content.xml, verify if it has changes. If your changes are there in vault-works then the maven-resources-plugin is working absolutely fine and the issue may be with the content-package-maven-plugin.


Viewing all 162 articles
Browse latest View live


<script src="https://jsc.adskeeper.com/r/s/rssing.com.1596347.js" async> </script>